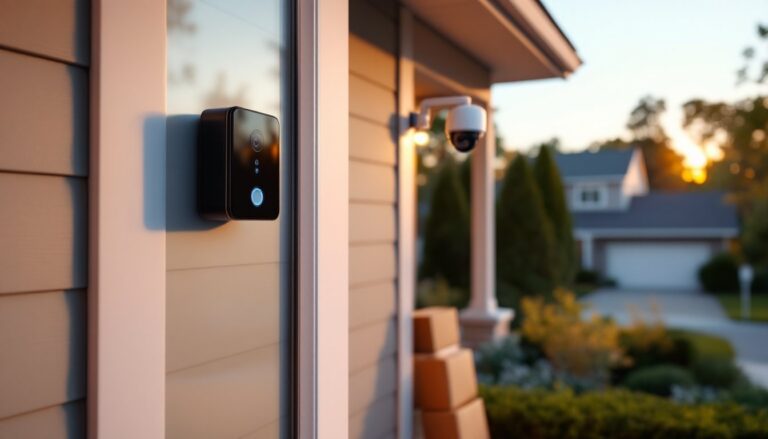
Monthly fees add up fast. A $10 cloud storage subscription doesn’t sound like much until you’re looking at $120 a year, or $600 over five years, just to access your own security footage. Subscription-free camera systems flip that model. They store video locally, skip the recurring charges, and still deliver reliable motion detection, night vision, and remote viewing. Whether someone’s looking to monitor a front porch, driveway, or entire property perimeter, no-subscription cameras offer full control without the ongoing cost. Here’s a breakdown of the top systems for 2026 and what to look for when cutting the cord on monthly fees.
Table of Contents
ToggleKey Takeaways
- Subscription-free security camera systems eliminate recurring monthly fees while providing local storage, reducing total cost of ownership by up to $600 over five years compared to cloud-based alternatives.
- The best home security camera system without subscription should include at least 1080p resolution, AI-powered motion detection, night vision, IP65+ weather rating, and two-way audio for comprehensive property protection.
- Wired PoE systems like the Reolink RLK8-800B4 offer expandable multi-camera coverage with 2TB+ storage and pay for themselves within two years, while budget options like Wyze Cam v3 provide affordable entry-level monitoring for under $40 per camera.
- Local storage on microSD cards or NVRs keeps footage private and secure without relying on third-party servers, but requires periodic management such as card formatting and storage monitoring.
- Wireless solar-powered cameras like the Eufy SoloCam S340 eliminate installation complexity for remote areas, though Wi-Fi signal strength and non-expandable storage are limiting factors to consider.
- Proper setup includes planning camera placement for optimal coverage, checking Wi-Fi signals, securing cable runs, configuring motion zones to reduce false alerts, and maintaining local storage through quarterly archiving and firmware updates.
Why Choose a Subscription-Free Security Camera System?
The primary reason is simple: total cost of ownership. A four-camera system with a $15/month subscription costs $720 over four years, often more than the cameras themselves. Subscription-free models eliminate that expense entirely.
Privacy is the second driver. Local storage means footage stays on a microSD card or NVR (network video recorder) inside the home. No third-party server holds clips, reducing the risk of data breaches or unauthorized access. For homeowners wary of cloud vulnerabilities, modern security systems with local storage offer peace of mind.
Feature parity has improved dramatically. Early no-subscription cameras sacrificed AI detection, person/vehicle recognition, and app-based alerts. Today’s models include smart motion zones, two-way audio, and color night vision, all without a monthly fee. The trade-off is storage management: users need to format cards periodically or invest in larger NVRs, but that’s a one-time task, not a recurring bill.
Another advantage: no service interruptions. Subscription-based systems can lose functionality if a payment fails or a company sunsets a product line. Local systems keep recording as long as the hardware works. That independence appeals to DIYers who prefer control over reliance on vendor cloud infrastructure.
Top Features to Look for in No-Subscription Security Cameras
Resolution matters. Look for at least 1080p (2MP): 4K (8MP) is better for capturing license plates or facial details at distance. Higher resolution eats storage faster, so balance image quality with card capacity.
Night vision: Standard infrared LEDs work to about 30 feet. Starlight sensors or color night vision (using white LEDs or ambient light) provide clearer footage in low light. If the camera covers a dimly lit driveway, color night vision helps identify clothing or vehicle color, details IR washes out.
Field of view (FOV): Wider angles (110°–130°) cover more ground but can distort edges. Narrower FOV (~90°) works better for focused areas like doorways. Some cameras offer pan/tilt to adjust coverage remotely.
Motion detection: Basic pixel-change detection triggers on tree branches and passing cars. AI-powered detection distinguishes people, vehicles, and animals, cutting false alerts by 70–80%. Check whether AI runs on-device or requires cloud processing, local AI keeps the system subscription-free.
Two-way audio lets users speak through the camera. Useful for delivery instructions or deterring package thieves. Look for noise cancellation and echo reduction: cheaper models produce garbled audio.
Weather rating: Outdoor cameras need IP65 or higher. IP66 and IP67 handle driving rain and dust. Operating temperature range matters in extreme climates, most spec -4°F to 122°F, but verify if installing in northern winters or desert heat.
Local Storage vs. Cloud Storage
Local storage uses microSD cards (typically 32GB–512GB) or a dedicated NVR. A 128GB card holds roughly 3–5 days of continuous 1080p footage, or 2–3 weeks of motion-activated clips. NVRs for multi-camera systems often include 2TB–8TB hard drives, supporting weeks or months of retention. Advantages: zero monthly cost, full privacy, no internet dependency for recording. Drawback: if someone steals the NVR or camera, the footage goes with it.
Hybrid models offer optional cloud backup for critical events while keeping routine clips local. Some brands provide a few days of free cloud storage, then charge for extended retention. These can bridge the gap, but verify the “free” tier doesn’t disable features like AI detection, a tactic some vendors use to push subscriptions.
Pro tip: Use high-endurance microSD cards (like SanDisk High Endurance or Samsung PRO Endurance). Standard cards wear out faster under constant write cycles. Budget $15–$40 per card depending on capacity.
Best Overall: Reolink RLK8-800B4 PoE System
The Reolink RLK8-800B4 is a wired 8-channel 4K PoE system that includes four 8MP cameras and a 2TB NVR. It’s the top pick for homeowners who want whole-property coverage without subscriptions or Wi-Fi headaches.
Why it works: PoE (Power over Ethernet) runs power and data through a single Cat5e/Cat6 cable, simplifying installation. No need to place cameras near outlets or rely on battery charging. The 2TB NVR records continuously or on motion for weeks, and users can swap in larger drives (up to 16TB on some Reolink NVRs). The system supports up to eight cameras, so it’s expandable.
Key features:
- 4K resolution captures clear detail at 30+ feet
- Person/vehicle detection with on-NVR AI, no cloud required
- Color night vision up to 100 feet with built-in spotlights
- Mobile app (iOS/Android) for live view and playback
- IP66-rated cameras handle rain, snow, and dust
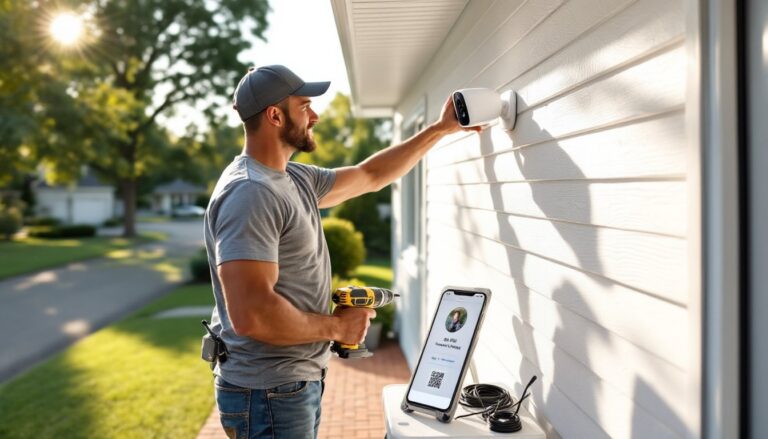
Setup: Run Ethernet from the NVR to each camera location. If attic or crawlspace access is available, routing cable is straightforward. For exterior walls, drill through the rim joist and seal with silicone caulk. The NVR connects to the home router via Ethernet for remote access. Total install time for a DIYer: 4–6 hours for four cameras.
Drawbacks: Wired systems require cable runs. Homes without attic access or those with brick/stone exteriors may need surface-mounted conduit or a professional installer. The upfront cost is higher (~$500–$600), but zero monthly fees mean it pays for itself versus subscription systems within two years.
When weighing different camera options, the Reolink consistently ranks for reliability and feature depth.
Best Budget Pick: Wyze Cam v3 with MicroSD Storage
The Wyze Cam v3 costs under $40 per camera and works entirely subscription-free with a microSD card (sold separately). It’s ideal for renters, apartment dwellers, or anyone testing the waters of DIY security.
Why it’s budget-friendly: No NVR required. Each camera records to its own card (up to 256GB). The Wyze app streams live video and lets users scrub through recorded clips. A 128GB card (~$20) holds 8–10 days of continuous 1080p footage or a month of motion events.
Key features:
- 1080p color night vision using a Starlight sensor
- IP65 weather rating for outdoor use
- Two-way audio with noise suppression
- Motion/sound detection with 12-second free cloud clips (optional)
- Works with Alexa and Google Assistant
Setup: Plug in via USB (included 6-foot cable), connect to 2.4GHz Wi-Fi, insert a microSD card, and mount with the included adhesive or screw mount. Total time: 10 minutes per camera. The magnetic base lets users adjust angle without remounting.
Limitations: Free cloud clips are 12 seconds, long enough to see who triggered motion, but not a full event. For complete recordings, the microSD card is essential. Person detection requires Wyze Cam Plus ($2/month per camera), but basic motion detection is free. Battery life isn’t a factor since it’s USB-powered, so placement is limited to areas near outlets unless using an outdoor-rated extension cord.
Many home security camera buyers choose Wyze for single-room or entry-point monitoring before scaling up to multi-camera systems.
Best Wireless Option: Eufy Security SoloCam S340
The Eufy SoloCam S340 is a wireless, solar-powered camera with 8GB of onboard storage, no microSD card, no NVR, no subscription. It’s perfect for sheds, detached garages, or perimeter areas where running power or cable isn’t practical.
Why it stands out: The integrated solar panel charges the 8,000mAh battery, keeping it running indefinitely with 2–3 hours of daily sunlight. The 8GB built-in storage holds weeks of motion clips. The camera uses dual lenses: a 3K wide-angle for overall coverage and a 2K telephoto for tracking subjects with AI-powered pan and tilt.
Key features:
- 3K resolution (2880 × 1620) with 8× hybrid zoom
- 360° pan and 70° tilt for automated tracking
- On-device AI for person, pet, and vehicle detection
- Two-way audio with advanced noise reduction
- IP67 weatherproof and operates -4°F to 122°F
Setup: Mount the camera (screw or adhesive), angle the solar panel toward the sun, and connect via the Eufy Security app over Wi-Fi. The app walks through motion zone setup and detection sensitivity. Install time: 15–20 minutes.
Considerations: Wi-Fi range is the limiting factor. If the install location is 50+ feet from the router, consider a Wi-Fi extender or mesh system. The camera connects to 2.4GHz only. The 8GB storage is non-expandable, so adjust motion sensitivity and recording length to maximize retention. In shaded areas, the solar panel may not keep up with heavy activity: the battery lasts 2–3 months without sun.
For properties needing flexible security camera placement, the SoloCam eliminates wiring entirely.
How to Set Up Your Subscription-Free Camera System
1. Plan camera placement
Walk the property and identify coverage zones: entry doors, driveway, garage, side gates, and blind spots. Cameras should overlap slightly to eliminate gaps. Mount height matters, 7–9 feet deters tampering but keeps faces recognizable. Avoid aiming cameras into direct sunlight or reflective surfaces (glass doors, car windshields) to prevent glare.
2. Check Wi-Fi coverage (wireless systems)
Use a phone app like Wi-Fi Analyzer to test signal strength at each camera location. Aim for -60 dBm or stronger. Weak signal causes dropped connections and lag. Add a mesh node or extender if needed. Wired PoE systems bypass this entirely.
3. Run cables (PoE systems)
Route Cat5e or Cat6 from the NVR to each camera. Use exterior-rated cable (direct burial or UV-resistant jacket) for outdoor runs. Drill through siding into attic or basement, then fish cable to camera locations. Seal penetrations with silicone or foam. Label both ends of each cable for easier troubleshooting.
4. Mount cameras
Use the included mounting brackets or purchase adjustable junction boxes for better angle control. Pre-drill pilot holes in wood siding: use masonry anchors for brick or stucco. Ensure the camera housing seats flush against the mount to prevent water intrusion. Tighten screws firmly but don’t overtorque, plastic housings can crack.
5. Configure the system
Connect the NVR or base station to the router via Ethernet. Power on cameras. Most systems auto-detect cameras on the same network. Open the mobile app, create an account, and follow the setup wizard. Set motion zones to exclude trees, roads, or neighbor’s property, this cuts false alerts. Enable push notifications for person/vehicle detection. Test live view and playback from a remote location (using cellular data, not home Wi-Fi) to confirm external access works.
6. Set up storage
For microSD systems, format cards in-camera (via the app) to ensure compatibility. For NVRs, verify the drive is recognized and set recording mode: continuous, motion-only, or scheduled. Motion-only extends retention but may miss the seconds before an event triggers.
7. Adjust settings
Fine-tune motion sensitivity, start high and dial down if alerts are excessive. Set recording resolution (4K eats storage: 1080p is often sufficient). Enable night vision mode (auto, IR-only, or color). Configure privacy zones to mask areas like neighbor windows. Test two-way audio and adjust volume.
Safety: When drilling or routing cable through walls, use a stud finder and check for electrical wiring with a non-contact voltage tester. Wear safety glasses when drilling overhead. Use a stable ladder with a helper for roof or high-wall mounts.
Permit check: Camera installation typically doesn’t require permits, but verify local ordinances on recording audio (some states require two-party consent) and camera placement (aiming into neighbor’s property can violate privacy laws).
For homeowners integrating cameras with broader security setups, compatibility with existing door sensors and alarms matters, most no-subscription cameras operate standalone but some support IFTTT or smart home hubs for automation. Reviewing tested camera models helps match features to specific needs.
Once configured, subscription-free systems deliver reliable home protection without the monthly invoice. Storage management becomes a quarterly task, review and archive important clips, format cards to clear old footage, and check for firmware updates. That’s the full extent of ongoing maintenance.