Installing a mobile security camera doesn’t require running cable through walls or hiring an electrician. These wireless, battery-powered units go where hardwired systems can’t, streaming live footage straight to a smartphone. For homeowners tackling their own security upgrades, mobile cameras offer flexibility and control without the complexity of traditional CCTV setups. This guide walks through what mobile security cameras are, how to choose the right model, and where to mount them for maximum coverage around a property.
Table of Contents
ToggleKey Takeaways
- Mobile security cameras are wireless, battery-powered devices that stream video to your smartphone without requiring professional installation or complex wiring.
- Install mobile security cameras 8–10 feet high and at all entry points (doors, windows, gates) to maximize coverage and capture faces instead of blind angles.
- Choose cameras with at least 1080p resolution, infrared night vision, and HDR to handle glare and identify important details in various lighting conditions.
- Battery life varies from two weeks to six months depending on motion events and temperature; solar panel accessories can extend runtime indefinitely in sunny climates.
- Complete all camera setup including Wi-Fi pairing and motion detection testing at ground level before final mounting to simplify troubleshooting.
- Secure mounting brackets firmly, respect neighbor privacy by angling cameras away from neighboring properties, and test Wi-Fi signal strength before installation to prevent dropped footage and delays.
What Is a Mobile Security Camera and How Does It Work?
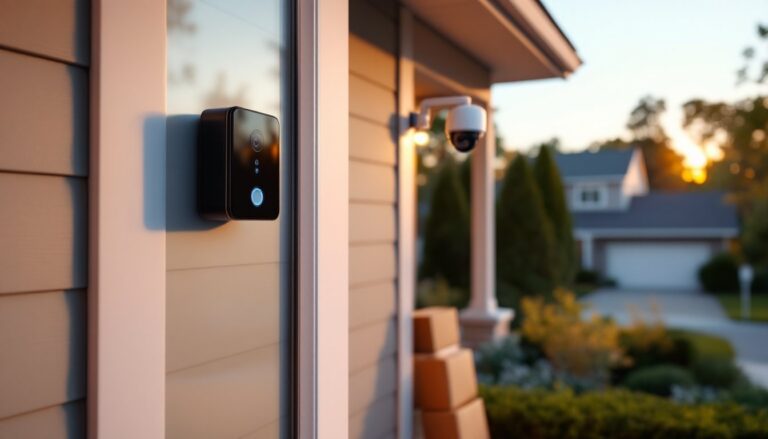
A mobile security camera is a wireless, battery-powered surveillance device that connects to a home Wi-Fi network and streams video to a smartphone app. Unlike hardwired systems that require 120V power and physical cabling, mobile cameras rely on rechargeable lithium-ion or lithium-polymer batteries and communicate via Wi-Fi (2.4 GHz or 5 GHz) or cellular data.
Most units use passive infrared (PIR) sensors to detect motion, triggering recording and sending push notifications to the homeowner’s device. Video is either stored locally on a microSD card (typically 32 GB to 256 GB) or uploaded to cloud storage through a subscription service. The camera’s processor compresses footage using H.264 or H.265 codecs to reduce file size and bandwidth usage.
Some models include two-way audio via built-in microphones and speakers, allowing users to communicate through the app. Higher-end cameras offer AI-powered person detection, distinguishing humans from animals or vehicles to reduce false alerts. Setup typically involves mounting the camera, downloading the manufacturer’s app, scanning a QR code to pair the device, and connecting to the home network. No professional installation is required, making them a popular choice for DIY homeowners.
Because they’re not hardwired, mobile cameras can be repositioned seasonally or moved to rental properties. Battery life varies from two weeks to six months depending on recording frequency, temperature, and wireless signal strength.
Key Benefits of Choosing Mobile Security Cameras for Your Home
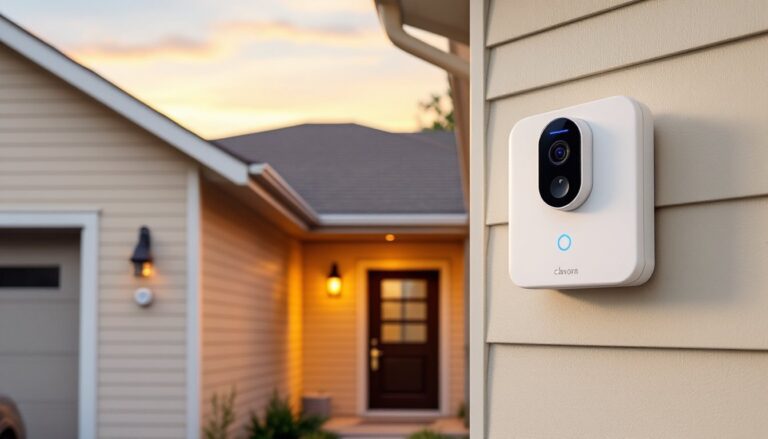
No wiring or electrical work. Mobile cameras eliminate the need to fish cables through walls, drill through siding, or tap into existing electrical circuits. This makes them ideal for renters, homeowners without electrical experience, or anyone monitoring outbuildings like sheds or detached garages where running power is impractical.
Flexible placement. Because they’re not tethered to an outlet, these cameras can be mounted on fence posts, trees, eaves, or any surface with a stable bracket. They’re particularly useful for monitoring driveways, side yards, or garden gates that fall outside the reach of traditional wired systems.
Remote access and alerts. Live footage streams directly to a smartphone, whether the homeowner is across town or across the country. Motion-triggered alerts arrive in real time, letting users verify deliveries, check on contractors, or confirm the dog hasn’t escaped the yard. Many systems integrate with broader home security setups for unified monitoring.
Scalability. Adding a camera to an existing system is as simple as pairing a new unit to the app. There’s no need to run additional cable or upgrade a central DVR. Homeowners can start with one camera and expand coverage as needed, building out a custom network over time.
Lower upfront cost. Without professional installation fees or expensive wiring, mobile cameras typically cost less to deploy than hardwired systems. DIYers handle the entire setup, saving labor charges that can run $100 to $300 per camera depending on the complexity of the installation.
Essential Features to Look for When Buying a Mobile Security Camera
Not all mobile cameras are built the same. Prioritize these features based on the specific demands of the property and climate.
Video Quality and Night Vision
Resolution matters when zooming in to identify a face or read a license plate. Look for 1080p (Full HD) as a baseline: 2K or 4K models provide sharper detail but consume more battery and bandwidth. A 130° to 160° field of view captures wide areas without requiring multiple cameras.
Night vision comes in two forms: infrared (IR) and color night vision. IR cameras use invisible LEDs to illuminate the scene in black and white, effective up to 25 to 30 feet. Color night vision relies on a small spotlight or ambient light amplification, delivering full-color footage in low light but potentially alerting intruders to the camera’s presence. For most residential applications, IR night vision is sufficient and less conspicuous. Some wireless security cameras reviewed in 2026 offer both modes, switching automatically based on ambient light levels.
HDR (High Dynamic Range) helps balance exposure when a camera faces direct sunlight or backlit subjects, preventing washed-out footage. It’s particularly useful for cameras monitoring entryways where bright daylight can obscure faces.
Battery Life and Power Options
Battery capacity is typically measured in milliamp-hours (mAh). A 5,000 mAh battery might last three months with moderate use (10–20 motion events per day), while heavy traffic areas may require recharging every two to four weeks. Cold weather significantly reduces runtime: lithium batteries lose 20% to 30% of their capacity below 32°F.
Some models offer solar panel accessories that trickle-charge the battery, extending runtime indefinitely in sunny climates. A small 2W to 3W solar panel is usually sufficient to offset daily power draw. For locations with consistent sunlight, this eliminates the need for manual recharging.
Dual power options, battery plus optional AC adapter, provide flexibility. Start with battery power to test placement, then add wired power if the location proves permanent. Avoid cameras that lock you into one power source if flexibility is a priority.
Check whether the battery is removable or built-in. Removable batteries allow swapping in a charged spare without unmounting the camera, while built-in batteries require removing the entire unit for recharging.
Best Placement Strategies for Maximum Coverage
Strategic placement maximizes coverage and minimizes blind spots. Start by sketching a simple site plan of the property, marking entry points, high-traffic zones, and vulnerable areas.
Mount cameras 8 to 10 feet high. This height keeps them out of easy reach while providing a downward angle that captures faces rather than the tops of heads. Use a level to ensure the camera isn’t tilted, which can skew motion detection zones.
Cover all entry points first. Front doors, back doors, garage doors, and ground-floor windows are the most common points of entry. A camera at the front door should capture the entire porch and walkway, while side and rear cameras should monitor gates and sliding doors. When choosing camera locations, consider how they fit into a larger home security strategy that addresses multiple vulnerabilities.
Overlap coverage zones. Position cameras so their fields of view intersect slightly. If one camera fails or is obscured, the adjacent camera still captures activity. For a driveway, mount one camera at the garage facing the street and another at the street facing the garage.
Avoid direct sunlight and glare. Cameras pointed directly at the rising or setting sun will produce washed-out footage. Eaves, overhangs, or north-facing walls (in the Northern Hemisphere) reduce glare. If a sunny location is unavoidable, choose a camera with strong HDR performance.
Test Wi-Fi signal strength before final mounting. Walk the proposed camera location with a smartphone and check signal bars or use a Wi-Fi analyzer app. A weak signal leads to dropped footage, delayed alerts, and faster battery drain. If signal is poor, consider adding a Wi-Fi extender or mesh node to strengthen coverage. Many top-rated cameras in 2026 include signal strength indicators in their setup apps.
Respect neighbors’ privacy. Angle cameras to avoid capturing neighboring yards or windows. In some jurisdictions, recording areas where others have a reasonable expectation of privacy can lead to legal issues. Keep coverage focused on the homeowner’s property boundaries.
Installation Tips for DIY Homeowners
Mobile camera installation is straightforward, but attention to detail prevents headaches later.
Gather tools and materials before starting. Most installations require a drill with masonry or wood bits (depending on mounting surface), Phillips-head screwdriver, level, pencil, and the included mounting hardware. For brick or stucco, use plastic anchors and masonry screws: for wood siding or trim, standard #8 or #10 wood screws work fine. Wear safety goggles when drilling overhead.
Pre-drill pilot holes. Mark the mounting bracket’s screw locations with a pencil, then drill pilot holes slightly smaller than the screw diameter. This prevents splitting wood and ensures screws bite securely. For masonry, use a hammer drill with a carbide bit matched to the anchor size.
Secure the bracket firmly. Loose mounts allow wind to shift the camera’s angle, triggering false motion alerts or missing activity. Test the bracket by pulling on it: it shouldn’t wiggle or feel spongy. If mounting to vinyl siding, screw into the underlying sheathing or a stud, not just the siding itself.
Charge the battery fully before installation. Most cameras ship partially charged. A full charge prevents the camera from dying mid-setup and establishes a baseline for battery life monitoring. Follow the manufacturer’s initial charging instructions, some batteries require a 12-hour first charge.
Pair the camera to the app before mounting it high. Complete the Wi-Fi connection and test live streaming while the camera is at ground level or on a ladder. Troubleshooting connectivity is easier when the camera isn’t 10 feet overhead. Verify motion detection triggers correctly by walking through the camera’s view.
Adjust motion sensitivity zones. Most apps allow drawing custom detection zones to exclude areas like busy streets or swaying branches. Start with medium sensitivity and refine based on the number of false alerts. High sensitivity captures everything but drains battery faster. Testing different security camera configurations helps identify the ideal settings for each location.
Protect cables and connections. If using a solar panel or optional AC power, route cables along eaves or through conduit to prevent UV degradation and water intrusion. Use cable clips or staples (without piercing the cable) to secure runs. Seal entry points with silicone caulk to block moisture.
Set a recharging schedule. Check battery levels weekly for the first month to establish a usage pattern, then set calendar reminders for recharging. Some apps send low-battery alerts, but proactive monitoring prevents gaps in coverage. Keep a spare battery charged if the camera supports swappable packs.
Update firmware regularly. Manufacturers release updates to fix bugs, patch security vulnerabilities, and add features. Enable automatic updates in the app or check manually every month. Outdated firmware can leave cameras vulnerable to hacking or cause compatibility issues with smartphone OS updates.
Document camera settings and login credentials. Write down the Wi-Fi network name, camera passwords, and app login info. Store this in a secure location separate from the devices themselves. If the homeowner sells the property or transfers the system to someone else, this documentation streamlines the handoff. For those integrating cameras with a broader system, reviewing best practices for camera selection ensures compatibility and performance.
Mobile security cameras put DIY surveillance within reach of any homeowner willing to drill a few holes and pair a device. With thoughtful placement, feature selection, and installation care, a wireless system delivers reliable monitoring without the cost or complexity of professional setups.