Expanding a Bunker Hill security camera system beyond its stock cable length is a common need for homeowners covering larger properties or positioning cameras at a distance from the DVR. Standard surveillance cameras often ship with 50- to 60-foot cables, which fall short when mounting a camera on a detached garage, barn, or far corner of a yard. Extension cables bridge that gap without requiring a full system overhaul. Understanding which cable types work with Bunker Hill systems, and how to install them without signal degradation, saves time, money, and the frustration of a camera that won’t power on or deliver a clear image.
Table of Contents
ToggleKey Takeaways
- Bunker Hill security camera extension cables use industry-standard BNC connectors and 12V DC power, making them compatible with third-party cables from brands like Amcrest and VideoSecu.
- RG59 75-ohm coaxial cable is the standard for video extension, while 18 AWG wire safely extends 12V power up to 50 feet—upgrade to 16 AWG for runs up to 100 feet to prevent voltage drop.
- Measure your actual cable route (not straight-line distance) and add 10–15% slack for corners and drip loops; for analog video runs beyond 200 feet, signal quality degrades without a video balun or amplifier.
- Proper installation requires twist-locking BNC connectors firmly, testing voltage at the camera with a multimeter before mounting, and weatherproofing all outdoor connections with dielectric grease and self-fusing silicone tape.
- Snowy images typically indicate signal loss from poor-quality cable or excessive length, while voltage readings below 11V at the camera suggest you need thicker power wire or a second power supply closer to the installation site.
What Are Bunker Hill Security Camera Extension Cables?
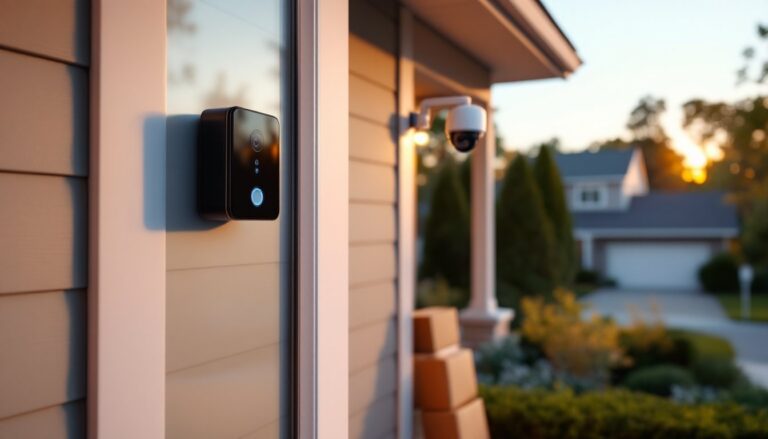
Bunker Hill security camera extension cables are supplementary wiring components that lengthen the distance between a camera and its power source or recording device. Bunker Hill systems, sold primarily through Harbor Freight, are analog surveillance setups that use coaxial BNC connectors for video transmission and separate DC power cables (typically 12V) for electrical supply.
Most Bunker Hill cameras ship with an integrated cable that combines video and power in a single jacket, often referred to as a Siamese cable. When the included length isn’t sufficient, installers add extension cables that mate with the camera’s connectors and run to the DVR or power adapter.
These extensions are not proprietary. Bunker Hill cameras use industry-standard connectors, so third-party cables from manufacturers like Amcrest, VideoSecu, or generic security supply brands are fully compatible. The key is matching the connector type (BNC for video, barrel jack or terminal block for power) and ensuring the cable meets the voltage and impedance specifications, 75-ohm coaxial for video and appropriate gauge wire for 12V DC power over the required distance.
Extension cables do not amplify signals. Over long runs (beyond 200 feet for analog video), image quality can degrade due to resistance and interference. For distances exceeding 300 feet, consider a video balun to convert the signal to twisted-pair Ethernet cable, or upgrade to an IP camera system.
Types of Extension Cables Compatible with Bunker Hill Security Cameras
BNC Cables for Analog Systems
Bunker Hill analog cameras transmit video via BNC (Bayonet Neill-Concelman) coaxial cables. BNC connectors twist-lock into place, providing a more secure connection than screw-on F-type connectors used in cable TV.
When selecting a BNC extension cable, verify it’s RG59 coaxial cable, the standard for CCTV applications. RG59 has a 75-ohm impedance that matches the camera’s output and the DVR’s input, minimizing signal reflection and image noise. RG6 cable, common in satellite installations, also works but is stiffer and overkill for runs under 500 feet.
Pre-made BNC cables come in lengths from 10 to 200 feet. For custom lengths, buy bulk RG59 and crimp or solder BNC connectors yourself. Compression BNC connectors are easier for DIYers than crimp types and don’t require a specialized tool, a coax stripper and compression wrench suffice.
Avoid cheap “security camera cables” with thin copper-clad aluminum (CCA) conductors. Pure copper core cable maintains signal integrity over distance. Quality cables are labeled with the conductor material and gauge. Many home security camera reviews emphasize cable quality as a factor in long-term reliability.
Power Extension Cables and Adapters
Bunker Hill cameras run on 12V DC power. The stock power cable terminates in a barrel plug (also called a coaxial power connector, typically 2.1mm or 2.5mm inner diameter) or a two-wire pigtail for terminal block connection.
Power extensions come in two forms:
- DC barrel extension cables: Male-to-female cables that splice between the camera’s power pigtail and the AC adapter. Available in 10- to 50-foot lengths.
- 18 AWG or 16 AWG two-conductor wire: For longer runs or custom installations. Strip the ends and connect via terminal blocks or solder to barrel connectors.
Voltage drop is the critical consideration. 12V DC loses voltage over distance due to wire resistance. A camera rated for 12V may malfunction if it receives only 10.5V due to a long, thin power cable. Use this rule of thumb:
- 18 AWG wire: up to 50 feet
- 16 AWG wire: 50 to 100 feet
- 14 AWG wire: 100 to 150 feet
For runs beyond 150 feet, install a second power supply closer to the camera or use a 24V AC system (if the camera supports it), which suffers less voltage drop.
Some installers use Cat5e or Cat6 cable to carry DC power by pairing the four twisted pairs in parallel, effectively lowering resistance. This works but voids cable warranties and isn’t recommended for outdoor burial without proper conduit.
How to Choose the Right Cable Length for Your Setup
Measure the actual route the cable will travel, not the straight-line distance. Run a measuring tape or a length of string along walls, through attic spaces, across eaves, and down to ground level. Add 10-15% slack for corners, drip loops (to prevent water from traveling along the cable into connectors), and connection points.
For example, a camera 80 feet from the DVR in a straight line may require 100 feet of cable once you account for vertical drops, routing around obstacles, and service loops at both ends.
Maximum run distances before signal quality suffers:
- Analog video (RG59): 750 feet (passive), up to 1,500 feet with a video amplifier or balun
- 12V DC power (18 AWG): 50 feet before noticeable voltage drop
- 12V DC power (16 AWG): 100 feet
- 12V DC power (14 AWG): 150 feet
If the video run is 200 feet but the power run exceeds safe limits, split the solution: run RG59 for video the full distance and install a weatherproof 12V power supply near the camera, plugged into an outdoor-rated outlet or wired to a junction box. This is common for smart home installations where cameras are mounted on detached structures.
Outdoor vs. indoor cable: For exterior runs, use direct-burial rated or UV-resistant cable. Standard indoor Siamese cable degrades under sunlight within a year. If running cable through conduit (PVC or EMT), indoor-rated cable is acceptable because the conduit provides UV and moisture protection.
Buy cable in the next standard length up if you’re between sizes. A 100-foot cable for a 95-foot run is smarter than splicing two shorter cables, which introduces potential failure points.
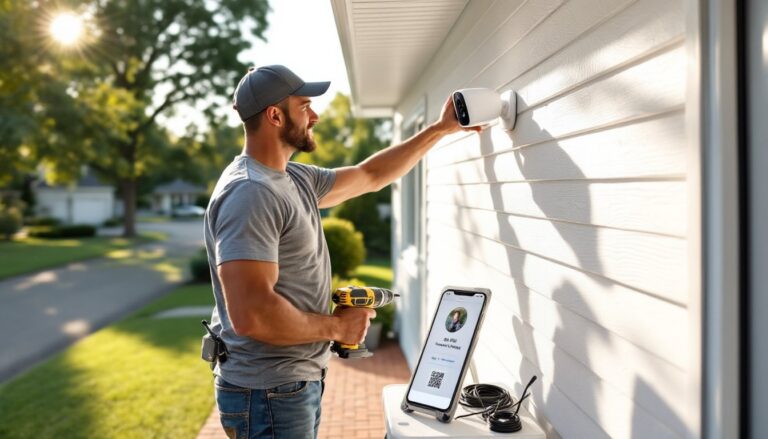
Step-by-Step Installation Guide for Extension Cables
Tools and materials:
- BNC extension cable (RG59, appropriate length)
- DC power extension cable or bulk wire (correct AWG)
- Coax stripper (if terminating custom cables)
- Wire strippers and electrical tape
- Cable staples or zip ties for securing
- Drill with appropriate bits for wall penetration
- Silicone sealant for outdoor cable entry points
- Multimeter (for testing voltage at camera)
Safety: Wear safety glasses when drilling overhead. Use a stud finder to avoid drilling into electrical wiring or plumbing. If running cable through an attic, wear a dust mask and gloves.
Step 1: Power off the system
Unplug the DVR and camera power supply. Disconnect the camera from its existing cable.
Step 2: Route the extension cable
Run the BNC video extension from the DVR to the camera location. For attic or crawl space runs, fish the cable through the same wall cavities used for other low-voltage wiring (never bundle with 120V AC wiring, maintain at least 6 inches separation to avoid interference).
For exterior walls, drill a ⅝-inch hole angled slightly downward to the outside to prevent water intrusion. Insert a cable bushing or seal the penetration with silicone caulk.
Step 3: Connect the BNC extension
Twist-lock the male BNC connector from the camera’s pigtail into the female connector on the extension cable. Then connect the extension’s male end to the DVR input. The connection should be snug with no play, loose BNC fittings cause intermittent video loss.
Step 4: Extend the power cable
If using a barrel extension, plug the camera’s power pigtail into the female end and the male end into the AC adapter. If using bulk wire, strip ¼ inch from each conductor, connect positive to positive (usually red or marked with a stripe), and negative to negative. Secure with wire nuts or solder and heat-shrink tubing. Electrical tape alone is inadequate for outdoor connections.
Step 5: Test voltage at the camera
Before mounting, use a multimeter set to DC voltage. Touch the probes to the camera’s power input terminals. You should read 11.5V to 12.5V. If below 11V, the cable run is too long or the wire gauge too small. Either shorten the run, upsize the wire, or add a local power supply.
Step 6: Secure and weatherproof
Fasten cables every 2-3 feet along their run using cable staples (for wood) or adhesive cable clips (for vinyl or metal). Leave a small drip loop, a U-shaped sag, before the cable enters the camera housing so water doesn’t flow into the connection.
Seal all outdoor connections with self-fusing silicone tape or heat-shrink with sealant. Standard electrical tape degrades outdoors.
Step 7: Power on and verify
Reconnect power to the DVR and camera. Check the monitor for a clear image. If the picture is snowy or absent, re-seat the BNC connectors and check for damaged cable.
Common Issues and Troubleshooting Tips
No video signal: Verify the BNC connection is fully locked. Inspect the center pin of the coax, if it’s bent or recessed, the connector may need re-termination. Test the extension cable independently by connecting it between a known-good camera and the DVR.
Snowy or grainy image: This indicates signal loss from excessive cable length, poor-quality cable (CCA instead of copper), or interference from nearby AC wiring or fluorescent lights. Shorten the run, upgrade to higher-quality RG59, or use a video ground loop isolator if interference is suspected.
Camera powers on but image is dim or flickering: Sign of voltage drop. Measure voltage at the camera with a multimeter. If below 11V, upgrade the power cable to a lower AWG or add a dedicated power supply closer to the camera.
Intermittent connection: Often caused by a loose BNC connector or corroded contacts. Disconnect, inspect for green oxidation, and clean with contact cleaner or isopropyl alcohol. If the connector is damaged, cut it off and install a new one.
Water intrusion in outdoor connections: Moisture causes short circuits and corrosion. Always use dielectric grease inside BNC and power connectors before assembly, and wrap with self-fusing silicone tape. Never rely on standard PVC electrical tape for weatherproofing.
DVR doesn’t recognize the camera: Some DVRs auto-detect cameras on startup. Power-cycle the DVR after connecting the extension. If the issue persists, test the camera on a different channel to rule out a bad DVR input.
Cable run through conduit is difficult: Pull a fish tape or nylon pull cord through the conduit first, attach it to the cable, and pull. Apply cable pulling lubricant to reduce friction. Don’t exceed the conduit’s fill capacity (40% for single cable, 30% for multiple cables per NEC guidelines).
For persistent issues, consult resources like home tech troubleshooting guides or consider hiring a licensed low-voltage technician. Some problems, like damaged cable sheathing or crushed coax, aren’t field-repairable and require cable replacement.
Expanding a Bunker Hill system with extension cables is straightforward when cable types, lengths, and installation practices align with the system’s analog architecture. The result is flexible camera placement without compromising image quality or reliability.