Garages are statistically one of the most common entry points for break-ins, right behind unlocked front doors and first-floor windows. Whether detached or attached, a garage offers cover, tool access, and often a direct path into the home through an interior door that many homeowners leave unlocked. Even though this, most security camera setups focus on the front porch and backyard while leaving the garage exposed. Installing a dedicated garage security camera isn’t just about catching package thieves or monitoring who’s coming and going. It’s about closing a security gap that burglars actively look for.
Table of Contents
ToggleKey Takeaways
- Garages are a primary entry point for break-ins, making a dedicated garage security camera essential for closing a critical security gap.
- Choose a camera with infrared night vision (minimum 850nm IR LED array) and an operating temperature range of -4°F to 122°F to handle garage conditions like low light and temperature extremes.
- Mount cameras 8-10 feet high inside the garage to cover entry doors and capture facial details, and position outdoor cameras above the garage door angled at 15-20 degrees to capture license plates and driveway approaches.
- PoE (Power over Ethernet) wired cameras offer superior reliability and immunity to Wi-Fi interference, while wireless cameras provide easier installation if your garage has adequate signal strength.
- Test Wi-Fi signal strength, mount cameras securely at proper heights, run weatherproofed cables, and fine-tune motion detection zones to avoid false alarms and maximize your garage security camera’s effectiveness.
Why Your Garage Needs a Dedicated Security Camera
Garages serve triple duty: storage, workshop, and vehicle shelter. They also house expensive tools, bikes, lawn equipment, and sometimes a freezer full of food. Beyond the contents, an open or malfunctioning garage door signals to passersby that no one’s home.
A dedicated camera provides real-time alerts when motion is detected, whether it’s a door opening after hours or someone lingering near the opener keypad. Many break-ins happen in broad daylight, thieves know people are at work and garages are often isolated from neighbor sightlines. A visible camera acts as a deterrent, and a well-placed one captures faces, license plates, and tool serial numbers if the worst happens.
Attached garages pose an additional risk: interior doors between the garage and home are often hollow-core and lack deadbolts. If someone gains access to the garage, they’re one flimsy door away from the kitchen. Installing a camera inside the garage covers that interior door, the overhead door, and any windows. It also helps monitor for hazards like carbon monoxide from a running vehicle or a malfunctioning opener.
Key Features to Look for in a Garage Security Camera
Not every camera is built for garage duty. Residential garages experience temperature swings, low light, dust, and sometimes moisture. Picking the right hardware means understanding which specs actually matter.
Night Vision and Low-Light Performance
Most garages don’t have overhead lighting running 24/7, and many lack windows entirely. Infrared (IR) night vision is essential. Look for cameras with a minimum 850nm IR LED array that provides at least 25-30 feet of usable night vision. Some budget models claim night vision but only illuminate 10-15 feet, which won’t cover a two-car garage.
Starlight sensors or color night vision technology is a step up, they use ambient light from streetlamps or a nearby porch light to produce color footage instead of black-and-white IR. This helps with identifying vehicle colors and clothing details. Many modern outdoor security cameras now include this feature as standard.
Avoid relying solely on motion-activated spotlights. They’re useful for scaring off intruders but create blown-out footage and blind spots once the light clicks off.
Weather Resistance and Temperature Tolerance
Even interior garage cameras face conditions harsher than a living room. Unheated garages in cold climates can drop below freezing, while summer heat in a sealed garage can spike past 100°F.
Look for cameras with an operating temperature range of at least -4°F to 122°F (-20°C to 50°C). Cameras rated only for indoor use (typically 32°F to 104°F) may fail during seasonal extremes. If mounting outside to cover the driveway approach, choose a model with an IP65 or IP66 rating, weatherproof against rain, snow, and dust. IP ratings below 65 aren’t adequate for exterior exposure.
Condensation is another issue. Cameras installed in uninsulated garages can fog up when temperatures shift. Some higher-end models include built-in heaters or moisture-resistant housings to prevent this.
Best Placement Strategies for Maximum Coverage
Camera placement can make or break a security setup. The goal is to cover entry points, capture faces at a usable angle, and avoid blind spots.
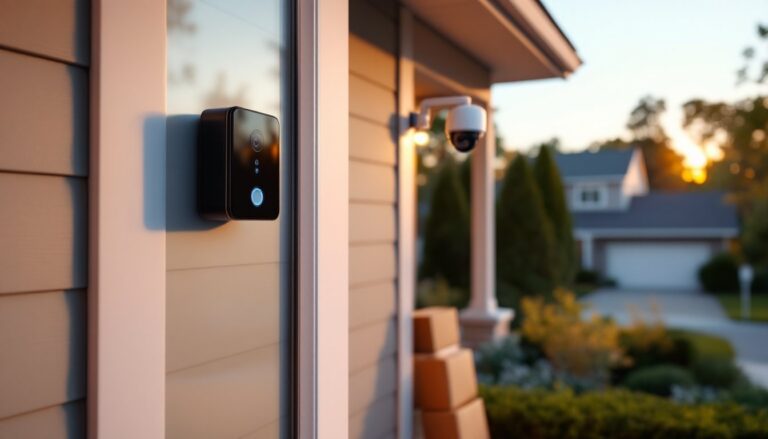
Inside the garage: Mount the camera in a back corner, 8-10 feet high, angled to cover the overhead door, side entry door, and interior door to the house. This height keeps it out of easy reach but still captures face-level detail for anyone standing near the doors. Avoid mounting directly above the overhead door, you’ll capture the tops of heads, not faces.
Outside the garage: Position a camera above the overhead door, angled down at 15-20 degrees. This covers the driveway approach, captures license plates, and monitors anyone at the keypad or manual lock. If you have a detached garage, add a second camera on the side or rear to eliminate blind spots.
Avoid common mistakes: Don’t aim cameras at bright light sources (street lamps, headlights, sunrise) or they’ll wash out details. Don’t mount too low, cameras below 7 feet are easy to knock offline or spray with paint. If using wireless cameras, confirm the signal reaches the garage before drilling mounting holes. Metal siding and thick insulation can block Wi-Fi.
Consider overlapping coverage: a camera inside the garage and one outside the overhead door ensure you capture both approach and entry. This redundancy is especially useful if someone covers one camera.
Wired vs. Wireless: Choosing the Right Setup for Your Garage
The wired-versus-wireless debate comes down to reliability, installation effort, and power availability in the garage.
Wired cameras (PoE or coaxial): Power over Ethernet (PoE) cameras run a single Cat5e or Cat6 cable from the camera to a network video recorder (NVR) or PoE switch, carrying both power and data. They’re dependable, immune to Wi-Fi interference, and don’t rely on batteries. Older coaxial systems (analog or HD-over-coax) require separate power and video cables. PoE is the modern standard and easier to retrofit.
Wired systems require running cable through walls, attic space, or conduit, which can be a challenge if the garage is detached or lacks attic access. Budget 1-3 hours per camera for installation if you’re drilling through framing. If the garage has an unfinished ceiling, it’s straightforward.
Wireless cameras (Wi-Fi or battery-powered): Wi-Fi cameras connect to your home network and record to a cloud service or local storage. They’re easy to install, mount, connect to Wi-Fi, done. But, signal strength in garages can be weak, especially with metal doors or concrete block walls. Consider adding a Wi-Fi extender or mesh node in or near the garage.
Battery-powered cameras eliminate wiring entirely but require recharging every 2-6 months depending on activity and temperature. Cold weather drains lithium batteries faster. Solar panel add-ons can extend runtime but aren’t practical for interior garage cameras.
Hybrid setups are common: a wired camera inside for reliability, and a wireless camera outside for flexibility. Comparing security options for homes can help clarify which configuration suits the property layout.
DIY Installation Tips and Common Mistakes to Avoid
Installing a garage security camera is a manageable DIY project for most homeowners, but there are a few gotchas that can derail the process.
Tools you’ll need:
- Drill/driver with masonry bits (if mounting to concrete or brick)
- Stud finder (for drywall or wood siding)
- Ladder (tall enough to reach mounting height safely)
- Cable fish tape or rods (for running wired cameras through walls)
- Wire strippers and crimpers (for PoE terminations, if needed)
- Voltage tester (if tapping into existing electrical)
Step-by-step for wireless cameras:
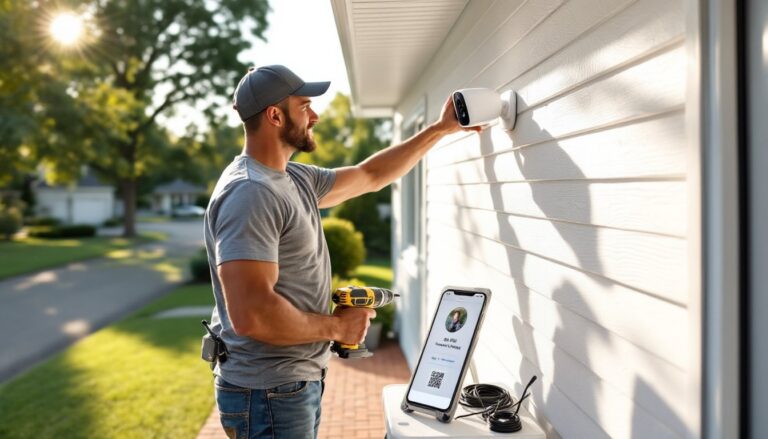
- Test Wi-Fi signal strength at the proposed mounting location using your phone. Aim for at least 3 bars or -70 dBm. If weak, add a range extender first.
- Mount the bracket using appropriate anchors, #10 plastic anchors for drywall, ¼-inch lag bolts for studs, Tapcon screws for concrete.
- Attach the camera and route the charging cable (if wired power is available) through the back of the mount or along the wall, secured with cable clips.
- Connect to the app and adjust the viewing angle before fully tightening. Record a test clip and verify you’re capturing the intended area.
Step-by-step for PoE cameras:
- Run Cat6 cable from the camera location to your NVR or PoE switch. Use existing cable runs if possible: otherwise, fish through walls or run along the ceiling. Secure with staples rated for data cable (don’t crush the cable).
- Terminate the cable with RJ45 connectors using a crimping tool, or use keystone jacks and pre-made patch cables for a cleaner install.
- Mount the camera as above, connecting the Ethernet cable to the camera’s PoE port.
- Power on the NVR and verify the camera appears in the system. Adjust angle and focus as needed.
Common mistakes to avoid:
- Not testing placement first: Use painter’s tape to mark the proposed camera position and check the view angle with your phone before drilling.
- Ignoring cable ratings: Use outdoor-rated Cat6 or direct-burial cable if routing underground or through unconditioned spaces. Indoor cable degrades in moisture and temperature swings.
- Mounting too low: Cameras under 7 feet are easily tampered with. Aim for 8-10 feet.
- Skipping weatherproofing on connections: Even if the camera is rated IP66, exposed Ethernet or power connections need weatherproof junction boxes or silicone sealant.
- Overloading circuits: If tapping into existing garage power for a wired camera or NVR, confirm the circuit can handle the load. Most PoE cameras draw 4-9 watts: an NVR might draw 20-50 watts.
Safety note: Wear safety glasses when drilling overhead, and use a properly rated ladder on a level surface. If running cable near electrical wiring, turn off power to nearby circuits and use a voltage tester. Don’t drill into areas where electrical, plumbing, or HVAC may be concealed without first verifying.
Many DIYers underestimate cable management. Loose cables are a tripping hazard and look sloppy. Use cable raceways, J-hooks, or Velcro straps to secure runs along walls or ceilings. For cleaner installs, paint raceways to match the wall color.
Finally, remember that some jurisdictions require permits for low-voltage wiring if it’s part of a larger security system install. Most DIY single-camera setups don’t, but check local regulations if you’re running multiple cameras or integrating with an alarm system. Understanding the broader landscape of residential security systems can help contextualize where a garage camera fits into a whole-home strategy.
Once installed, test motion detection zones in the camera’s app to avoid constant alerts from passing cars or swaying tree branches. Fine-tuning sensitivity and notification schedules (e.g., alerts only when you’re away) reduces false alarms and makes the system more useful. Many leading outdoor camera systems now include AI-based person and vehicle detection to cut down on nuisance notifications.
A well-installed garage security camera pays for itself in peace of mind. Whether you’re monitoring deliveries, checking if the door closed, or capturing evidence after an incident, the right camera in the right spot makes all the difference. Take the time to plan placement, choose hardware suited to the environment, and install it properly the first time.