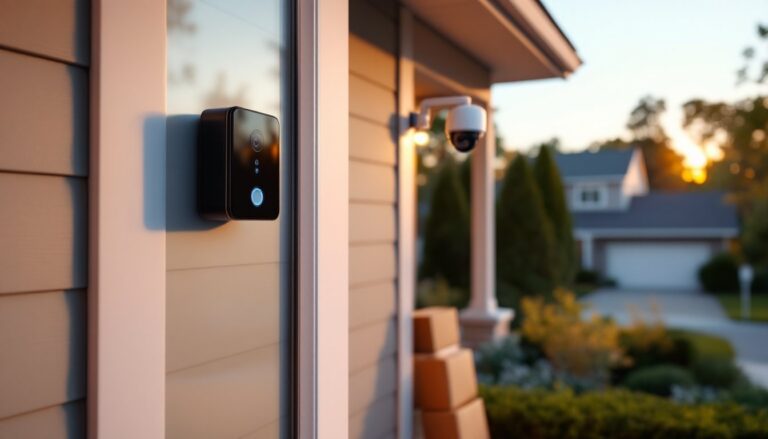
Audio separates a basic security camera from a tool that actually helps you respond to what’s happening. A video clip of someone at your door is useful. A video where you can hear what they’re saying, or tell them you’ll be right down, changes how you interact with your home when you’re not there. Indoor cameras with audio have become the standard for monitoring pets, checking in on kids, or catching package thieves before they make it past the entryway. This guide covers what makes audio capability worth the upgrade, how to install these cameras yourself, and the legal groundwork you need to cover before recording sound inside your home.
Table of Contents
ToggleKey Takeaways
- Audio transforms an indoor security camera from passive documentation to active intervention, allowing you to communicate in real-time with visitors, pets, or family members.
- Mount indoor cameras with audio at ear level (5–6 feet) away from hard surfaces and HVAC systems to capture clear speech and minimize echo or background noise.
- Two-party consent states including California, Illinois, and Pennsylvania require all parties to consent before recording audio, so check local laws and post clear signage to avoid legal issues.
- Audio-triggered alerts that distinguish between dog barks, glass breaking, and human speech provide more actionable notifications than generic motion alerts.
- Two-way audio adds $10–$20 to camera cost and enables real-time conversations with a typical 0.5–2 second delay, making it worth the upgrade if you plan to interact with people or pets.
- Test audio quality and coverage thoroughly before finalizing your indoor security camera installation by speaking from different areas and adjusting sensitivity settings via the manufacturer’s app.
Why Audio Matters in Indoor Security Cameras
Video gives you the what and where. Audio gives you the why and how.
A camera trained on an entryway might show someone jiggling a doorknob, but audio captures whether they’re knocking politely or trying to force entry. It records the sound of breaking glass, a smoke alarm going off in another room, or a dog barking at something outside the camera’s field of view. These auditory cues often provide context that video alone misses.
Two-way audio adds active intervention. Homeowners can speak through the camera to instruct a delivery driver, reassure a pet, or tell an unwanted visitor that the property is occupied. That real-time interaction is especially useful for households with kids arriving home from school, aging family members who need check-ins, or pets prone to separation anxiety.
Audio also supports better forensic evidence. If an incident escalates, recorded conversations or ambient sounds can clarify intent, timing, or the number of people involved, details that matter when filing insurance claims or working with law enforcement.
From a practical standpoint, many modern indoor security cameras come with audio by default. Disabling it is usually an option, but the feature costs little extra and integrates seamlessly with existing camera hardware.
Key Features to Look for in Audio-Enabled Indoor Cameras
Not all microphones are created equal. Indoor cameras typically use omnidirectional mics that pick up sound from all directions within a 15- to 25-foot radius, depending on the model. Higher-end units include noise cancellation to filter out HVAC hum, fan noise, or echo in hard-surfaced rooms.
Look for cameras with adjustable audio sensitivity. Too sensitive, and you’ll get alerts every time the fridge cycles on. Too low, and you’ll miss a voice at normal volume. Most apps let you dial this in after installation.
Audio quality is measured in kilohertz (kHz). A 16 kHz sampling rate is the baseline for clear speech. Some models offer 48 kHz, which captures more detail but eats up storage and bandwidth. For most indoor use, 16–24 kHz is plenty.
Check whether the camera supports audio-triggered alerts. Some systems can differentiate between a dog barking, glass breaking, or human speech, sending you specific notifications instead of generic motion alerts. Testing these features often involves advanced smart home technology that refines detection over time.
Local vs. cloud storage affects how long audio is retained. Cloud plans often limit audio history to 7–30 days unless you pay for extended storage. Local storage via microSD card or NAS keeps audio on your property but requires manual backup.
Two-Way Audio vs. One-Way Recording
One-way audio records sound but doesn’t transmit it back. It’s simpler, cheaper, and sufficient if you only want to review what happened. These cameras typically lack a speaker, saving a few dollars and a bit of power draw.
Two-way audio includes both a microphone and a built-in speaker, usually 2–4 watts. That’s enough to be heard clearly across a room, though it won’t compete with loud background noise. The speaker adds about $10–$20 to the camera’s cost and requires slightly more power, usually negligible if the camera is plugged in, but it shortens battery life on wireless models.
Two-way systems introduce a slight lag, typically 0.5 to 2 seconds, due to audio compression and network transmission. That delay is noticeable in real-time conversation but manageable. Higher-end models reduce latency through faster processors and local Wi-Fi prioritization.
If you plan to interact with people or pets, two-way is worth it. If you’re just documenting events, one-way recording does the job.
Best Placement Strategies for Maximum Audio Coverage
Audio behaves differently than video. A camera pointed at a doorway might have a perfect sightline, but if it’s mounted too high or too far away, voices sound muffled or distant.
Mount cameras at ear level when possible, roughly 5 to 6 feet off the floor. This puts the microphone closer to where conversations happen and reduces ceiling echo. If mounting higher for security reasons (to keep it out of reach), angle the camera slightly downward and test audio quality before finalizing the install.
Avoid hard, reflective surfaces directly adjacent to the camera. Tile, glass, or bare drywall can cause echo or reverberation, especially in bathrooms, kitchens, or entryways. If placement near hard surfaces is unavoidable, consider adding a fabric wall hanging, rug, or curtain nearby to dampen sound reflection.
Keep cameras away from HVAC vents, ceiling fans, and appliances that cycle on and off. Even with noise cancellation, persistent background hum can mask quieter sounds like footsteps or whispered speech.
For multi-room coverage, consider the layout of your home. Open floor plans allow a single camera to monitor several spaces, but audio doesn’t always reach as far as video. A camera in a central hallway can often capture sound from adjacent rooms if doors are open, but closed doors block audio almost entirely.
Test coverage with your phone before drilling mounting holes. Play a voice recording or speak at normal volume from various points in the room while reviewing playback quality on the camera’s app. Adjust placement based on what you actually hear, not where you think the camera should go.
Privacy and Legal Considerations for Audio Recording
Recording audio inside your home is generally legal, but laws vary by state and situation. The difference hinges on one-party vs. two-party consent.
In one-party consent states (the majority), you can record audio as long as one person in the conversation knows about it, typically you, the homeowner. In two-party (or all-party) consent states like California, Connecticut, Florida, Illinois, Maryland, Massachusetts, Montana, New Hampshire, Pennsylvania, and Washington, everyone being recorded must be aware and consent.
This gets murky when you have guests, contractors, or service workers in your home. Even in one-party states, it’s good practice to post a small sign near the camera stating “Audio and video recording in use.” That covers you legally and avoids awkward confrontations.
Do not record areas where people have a reasonable expectation of privacy: bathrooms, bedrooms used by guests, or changing areas. Even if it’s your home, recording audio in these spaces can violate wiretapping laws or civil privacy statutes.
If you employ household staff, housekeepers, nannies, contractors, check both state labor laws and your homeowner’s insurance policy. Some insurers require disclosure of audio recording to employees. Many home security systems now include consent workflows built into their apps.
For rental properties or shared living situations, landlord-tenant laws often restrict audio recording in common areas without explicit written consent from all tenants. Check local ordinances before installation.
Storing audio also triggers data privacy rules. If you use cloud storage, review the provider’s terms. Some services retain rights to access recordings for analysis or improvement of AI features. Local storage keeps control in your hands but makes you responsible for securing it.
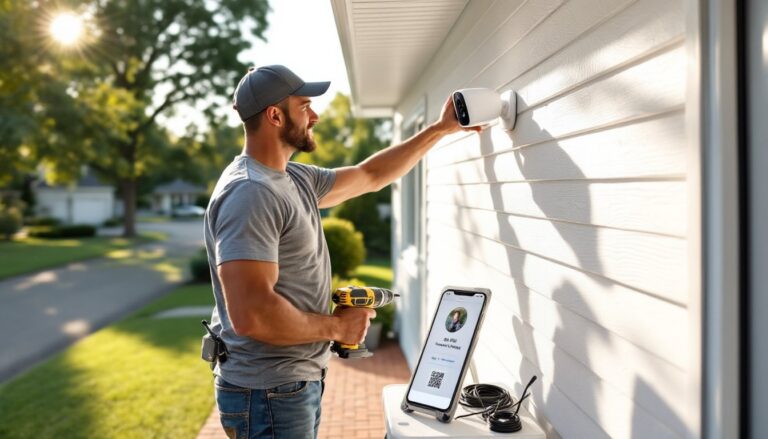
DIY Installation Tips for Indoor Audio Cameras
Most indoor cameras are plug-and-play, but thoughtful installation makes a big difference in performance.
Gather your tools and materials before starting:
- Power drill with masonry or wood bits (if mounting to studs or drywall)
- Anchors rated for the camera’s weight (usually under 1 pound, so #6 or #8 drywall anchors work)
- Stud finder for solid mounting
- Screwdriver (Phillips or flat, depending on mounting hardware)
- Cable clips or raceways if running power cords along walls
- Level (a small bubble level or smartphone app)
- Pencil for marking holes
Installation steps:
- Choose the mounting location based on audio coverage needs (see previous section). Mark the spot with a pencil.
- Check for studs if mounting to drywall. Screwing into a stud provides the most secure hold. If no stud is available, use drywall anchors rated for at least 5 pounds.
- Drill pilot holes at marked spots. For drywall anchors, use the bit size recommended on the anchor package. For wood studs, use a bit slightly smaller than the screw diameter.
- Insert anchors if needed, tapping them flush with the wall surface.
- Attach the mounting bracket to the wall using screws. Check level before tightening fully.
- Run power cables to the nearest outlet. Use cable raceways or clips to keep cords tidy and prevent tripping hazards. Avoid running cables near heat sources or across doorways.
- Mount the camera to the bracket and adjust the angle. Most cameras have a ball joint or tilt mechanism.
- Power on and connect to your Wi-Fi network via the manufacturer’s app. Follow prompts to test video and audio.
- Test audio quality by speaking from different areas of the room and reviewing playback. Adjust sensitivity settings as needed.
Common rookie mistakes:
- Skipping the stud finder and relying solely on drywall anchors in high-traffic areas. Bumps and vibrations can loosen anchors over time.
- Routing power cables where they’re visible in video feeds. Plan cable runs to stay outside the camera’s field of view.
- Over-tightening screws, which can crack plastic mounting brackets or strip drywall anchors.
- Forgetting to update firmware before finalizing placement. Some cameras require updates that reset settings.
If your home has plaster walls or concrete, use masonry bits and expansion anchors. Plaster is more brittle than drywall and requires pre-drilling to avoid cracking.
Troubleshooting Common Audio Quality Issues
Even well-placed cameras can develop audio problems. Here’s how to diagnose and fix the most frequent issues.
Muffled or distant-sounding audio: Usually caused by mounting the camera too far from the audio source or near sound-absorbing materials like heavy drapes or upholstered furniture. Relocate the camera closer to the area you’re monitoring or adjust sensitivity settings in the app. Some models let you boost gain, though this also amplifies background noise.
Echo or reverberation: Common in rooms with hard floors, bare walls, or high ceilings. Add soft furnishings, rugs, curtains, or acoustic panels, to dampen reflections. If relocation isn’t possible, reduce audio sensitivity to minimize pickup of reflected sound.
Static or crackling: Often a sign of a loose connection, damaged microphone, or electrical interference. Check that the power adapter is fully seated and the cable isn’t frayed. Move the camera away from other electronics like routers, baby monitors, or fluorescent lights, which can cause RF interference. If the problem persists, test with a different power outlet or contact the manufacturer.
Excessive background noise: HVAC systems, fans, or appliances can overwhelm the microphone. Enable noise cancellation if your camera supports it. Alternatively, reposition the camera away from direct airflow. Some users have upgraded their monitoring setups to models with better noise filtering.
Audio cutting in and out: Usually a bandwidth issue. Audio streams require less bandwidth than video but are more sensitive to packet loss. Check your Wi-Fi signal strength at the camera’s location using a phone app. If signal is weak (below -70 dBm), add a Wi-Fi extender or relocate your router. Hardwiring the camera via Ethernet eliminates this problem entirely if the model supports it.
Delay or lag in two-way audio: Some latency is normal, but if it exceeds 2–3 seconds, check for network congestion. Limit other devices streaming video during peak use, or set up a dedicated 2.4 GHz network for IoT devices. Firmware updates occasionally improve latency, so keep the camera’s software current.
No audio at all: Verify that audio recording is enabled in the camera’s settings. Some units ship with audio disabled by default due to privacy regulations. Also check app permissions on your phone, some iOS and Android versions require explicit microphone access even for playback. If settings are correct, test the microphone by tapping gently near it while watching the live feed: you should see an audio waveform or level indicator respond.
When troubleshooting, isolate variables. Test one change at a time, move the camera, adjust settings, or swap cables, so you know what actually fixed the problem. Keep notes if you’re managing multiple cameras or plan to expand your security setup later.
Safety note: When working with wall-mounted cameras, always use a sturdy step stool or ladder rated for your weight. Don’t overreach to adjust a camera while on a ladder, reposition the ladder instead. If drilling near outlets or existing wiring, use a non-contact voltage tester to confirm power is off.