Houston homeowners face unique security challenges, sprawling suburbs, high humidity, unpredictable weather, and property crime rates that make surveillance more necessity than luxury. Installing security cameras isn’t just about deterring package thieves anymore. It’s about monitoring who’s at your door during hurricane season, keeping an eye on your AC units (copper theft is real), and having video evidence if something goes sideways. Whether you’re mounting a Ring doorbell or running cables for a multi-camera NVR system, this guide walks through everything from selecting the right gear to drilling through brick without cracking your mortar.
Table of Contents
ToggleKey Takeaways
- Security camera installation in Houston requires weatherproof systems rated IP65 or higher due to intense humidity, driving rain, and extreme heat that can damage equipment.
- Wired PoE systems offer superior reliability and 4K resolution for security camera installation in Houston, while wireless options sacrifice range and battery life in the region’s climate.
- Mount cameras 7–10 feet high with proper sealing, secure anchoring for 50+ mph winds, and avoid common mistakes like exposing cables or positioning near vegetation that may obstruct views.
- Professional installation costing $150–$350 per camera is recommended for complex setups, electrical work, HOA compliance, and monitored security services across Harris County.
- Proper cable protection, firmware updates, and storage planning—accounting for 10–20 days of 4K footage capacity—are essential for maintaining long-term system performance in Houston’s unique climate.
Why Houston Homeowners Need Security Cameras
Houston’s crime statistics tell part of the story, but local factors make cameras particularly valuable here. Property crime, vehicle break-ins, porch piracy, catalytic converter theft, remains elevated in many neighborhoods from the Heights to Pearland. But beyond crime, Houston’s climate creates visibility issues. Afternoon thunderstorms roll in fast, and having timestamped footage of hail damage or wind events helps with insurance claims.
Flood zones present another angle. If you’re in a FEMA floodplain (and let’s be honest, half of Harris County qualifies), cameras positioned at ground level can document water intrusion timing for claims. Post-Harvey, insurers scrutinize flood vs. wind damage, and video doesn’t lie.
Many Houston homes sit on larger lots with detached garages, workshops, or RV pads. Monitoring those outlying structures from inside your house beats walking out in 95-degree heat to check if you left the garage door open. Modern systems also integrate with smart home platforms, letting you verify your HVAC contractor actually showed up or that your lawn crew finished before invoicing you.
Choosing the Right Security Camera System for Your Houston Home
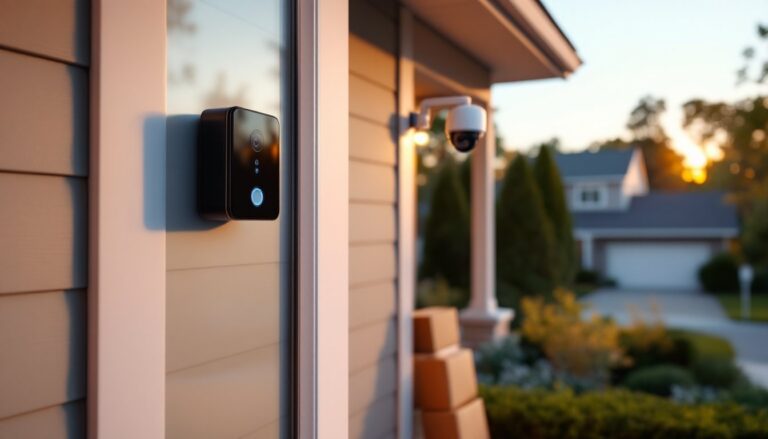
Camera selection hinges on coverage needs, infrastructure, and how hands-on you want to be. Wireless systems like Ring, Arlo, or Blink run on batteries or plug into outdoor outlets, connecting via Wi-Fi. They’re dead simple to install, mount, sync, done. The tradeoff? Battery life tanks in Houston summers (heat drains lithium-ion cells), and Wi-Fi range struggles through brick or Hardie siding. If your router sits at the front of the house and you need coverage out back by the pool, expect dropouts.
Wired systems (PoE or coaxial) require running cable but deliver reliable power and data. A Power over Ethernet (PoE) setup uses Cat5e or Cat6 cable to send both power and video to an NVR (network video recorder). This works well for permanent installations and supports 4K resolution without compression artifacts. Coaxial systems (analog HD or HD-TVI) use traditional security cable and DVRs. They’re cheaper but cap out around 1080p.
Resolution matters more than marketing claims suggest. 1080p handles general monitoring fine, you’ll see someone on your driveway. 4K (8MP) captures license plates and faces at greater distances, crucial if your driveway is 40 feet long. Check the camera’s field of view (FOV): 90–110 degrees suits most residential applications. Wider angles (130°+) introduce fisheye distortion.
Night vision uses infrared LEDs (black-and-white footage) or color night vision (ambient light sensors). Houston’s streetlights provide enough illumination in many areas for color night mode. If you’re in a darker subdivision, IR works to about 30–100 feet depending on the model. The best approach for choosing security systems involves balancing resolution, connectivity, and weather resistance suited to Gulf Coast conditions.
Indoor vs. Outdoor Cameras
Outdoor cameras need an IP65 or IP66 rating minimum, that’s dust-tight and protected against water jets. Houston’s rain doesn’t mess around: a camera rated only IP44 will corrode within a year. Look for operating temperature ranges of -4°F to 140°F. Asphalt shingle roofs and south-facing brick walls hit 130°F+ in July, and cameras mounted there need to handle it.
Housing material matters. Metal housings (aluminum or stainless) resist UV degradation better than plastic, which gets brittle and cracks. Avoid cameras with exposed cable ports unless you seal them with outdoor-rated silicone, moisture intrusion kills electronics.
Indoor cameras don’t need weatherproofing but should offer pan-tilt-zoom (PTZ) if covering large rooms. A fixed indoor camera works for monitoring a hallway or entryway: PTZ suits living rooms or open-plan areas. Privacy shutters (physical lens covers) are nice if you don’t want a camera staring at you 24/7.
DIY Security Camera Installation: Step-by-Step Guide
Tools and Materials:
- Cameras and mounting hardware (included with most kits)
- Power drill and masonry bits (for brick/concrete) or wood bits (for siding)
- Fish tape or cable rods (if running wires through walls)
- Cat5e/Cat6 cable (for PoE) or coax (for analog)
- Outdoor-rated cable clips or conduit (if surface-mounting cables)
- Silicone sealant (exterior-grade)
- Ladder (stable on uneven ground, Houston lawns aren’t always level)
- Voltage tester (if tapping into existing outdoor electrical)
- Safety gear: Safety glasses, gloves, dust mask (brick dust is nasty)
Step 1: Plan Camera Placement
Walk your property and identify blind spots. Standard positions:
- Front door and driveway: Capture faces and vehicles. Mount 7–9 feet high, angled down at 15–20 degrees.
- Back door and side gates: Most burglars try rear entry first.
- Garage and carport: Cover vehicle and tool storage.
- Yard perimeters: If you have a fence line or pool area, monitor access points.
Avoid aiming cameras directly at the sun, sunrise/sunset glare blinds sensors. Test angles with your phone camera before drilling.
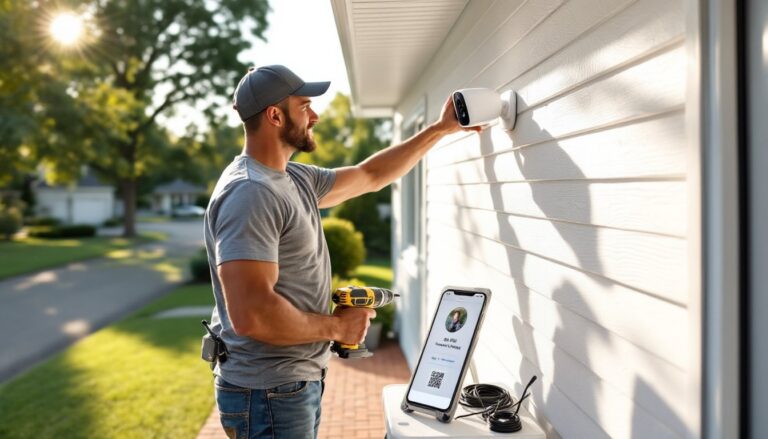
Step 2: Mount the Bracket
Most cameras come with a base plate or mounting arm. Hold it against the wall, mark screw holes with a pencil. For wood siding or trim, drill pilot holes slightly smaller than the screw diameter and drive stainless steel screws (they won’t rust). For brick or stucco, use a ¼-inch masonry bit, insert plastic anchors, then screw in.
Keep the mount level. A crooked camera looks amateur and skews motion detection zones.
Step 3: Run Cable (Wired Systems)
If you’re going PoE, run Cat6 from each camera location back to your NVR spot (usually a closet or garage). Drill a ⅜-inch hole through the exterior wall behind the camera, angled slightly downward to prevent water entry. Feed cable through, seal the hole with silicone.
For longer runs (over 50 feet), use outdoor-rated Cat6 with UV-resistant jacket. If crossing open areas, consider ½-inch PVC conduit to protect from weed eaters and lawn equipment. Staple cable to soffits or fascia every 12–18 inches with insulated staples, don’t crush the cable.
Step 4: Connect Power and Network
PoE cameras plug directly into the NVR’s PoE ports, no separate power needed. Wireless cameras either plug into an outdoor outlet (use a weatherproof cover) or run on rechargeable batteries. Test the camera before finalizing the mount, sync it to your app or NVR, verify the live feed, and check night vision.
Step 5: Adjust Angle and Secure
Tighten the camera onto the mount, adjust the viewing angle, then lock it down. Most cameras have a ball joint or swivel base secured by a set screw. Use a hex key to tighten, don’t rely on hand-tight: Houston wind will shift it.
Label cables at both ends (masking tape and Sharpie work). Future-you will appreciate knowing which cable feeds which camera when troubleshooting.
When to Hire a Professional Installer in Houston
DIY saves money, but some scenarios demand a pro. If you’re installing more than four cameras, running cable through finished walls, or integrating with existing alarm systems, a licensed installer knows the shortcuts and code requirements.
Electrical work beyond plugging into an outlet, like tapping into your breaker panel for powered cameras, requires a licensed electrician in Houston per the National Electrical Code (NEC). Running low-voltage wiring (Cat6, coax) doesn’t require a license, but drilling through load-bearing walls or attic trusses without knowing what you’re doing can compromise structural integrity.
Professional installation costs in Houston typically range from $150 to $350 per camera depending on complexity, according to recent local pricing data. That includes labor, cable runs, and configuration. If your home has two-story exteriors, tile roofing (fragile and easy to crack), or stucco over brick (requires special anchors), pay someone who does this daily.
Insurance and permits also factor in. Some HOAs or municipalities require permits for exterior camera installations, especially if mounting to shared structures (fences, mailboxes). A pro installer knows local regulations and pulls permits as part of the job.
Finally, if you want cameras integrated with a monitored security service, most providers (ADT, Vivint, Brinks) require professional installation to validate the warranty and monitoring contract. The monitoring option becomes particularly important in areas where police response times stretch due to resource constraints across Harris County’s expansive geography.
Houston-Specific Installation Considerations
Houston’s climate and construction styles create unique installation challenges. Humidity averages 75%, and cameras without proper seals develop condensation inside the lens housing. Look for cameras with desiccant packs or ventilation channels that prevent fogging.
Hurricane prep matters. Mount cameras securely, toggle bolts or masonry anchors rated for 50+ mph winds. During storm season, unplug wireless cameras or remove them entirely if evacuation is likely. Surge protectors on NVRs and PoE switches prevent lightning damage (and Houston gets plenty of lightning).
Brick veneer is common in Houston homes, but it’s often just a 4-inch layer over wood framing. Drill into the mortar joints, not the brick itself, mortar is softer and repairs easier if you ever move cameras. Use a carbide masonry bit and drill slowly to avoid cracking.
Soffit and fascia mounting works well here since most homes have wide eaves. This protects cameras from direct rain and sun. Make sure you’re screwing into solid wood (rafter tails or blocking), not just vinyl soffit, it won’t hold.
Foundation plantings (azaleas, boxwoods, ornamental grasses) can block camera views as they grow. Trim vegetation or mount cameras higher. Fire ants also love nesting near camera cables buried in mulch beds, run conduit if going underground.
Many Houston neighborhoods have deed restrictions on visible exterior equipment. Check with your HOA before mounting a dozen cameras on your front elevation. Some communities require cameras to match house color or be discreetly positioned. Understanding the range of features available for modern security systems helps balance aesthetics with effective coverage.
Common Installation Mistakes to Avoid
Mounting too low. Cameras below 7 feet are easy to vandalize or spray-paint. A determined intruder with a broomstick can knock down a camera mounted at 5 feet. Aim for 8–10 feet on walls, angled downward.
Ignoring cable protection. Exposed cables along the ground or dangling from eaves get cut, chewed by squirrels, or damaged by trimmers. Use weatherproof conduit or run cables inside walls and attics.
Skipping weatherproofing. Even “weatherproof” cameras need sealed cable entries. Apply a bead of silicone sealant around cable ports and mounting screws. Houston’s driving rain finds every gap.
Overloading PoE switches. Each PoE camera draws 4–15 watts depending on features (PTZ and heaters draw more). An 8-port PoE switch rated for 60W total can’t power eight 12W cameras, you’ll get dropouts. Calculate total wattage and leave 20% headroom.
Poor Wi-Fi planning. Wireless cameras need strong signal, at least two bars in your app. Brick walls, metal siding, and distance kill Wi-Fi. Run a mesh extender or use a dedicated outdoor Wi-Fi access point for cameras 50+ feet from your router. Homeowners researching various camera options online often underestimate Houston’s signal interference from dense construction.
Forgetting about glare and backlighting. Cameras pointed at bright skies or streetlights produce washed-out footage. Enable WDR (Wide Dynamic Range) in camera settings to balance exposure, or reposition cameras to avoid direct light sources.
Not testing night vision range. A camera rated for “100-foot night vision” might only deliver 50 feet in reality. Walk your property after dark and verify coverage before buttoning up the installation.
Skipping firmware updates. Many cameras ship with outdated firmware that has security vulnerabilities. Connect cameras to your network, log into the manufacturer’s app or web interface, and update firmware immediately. Set reminders to check quarterly. When planning projects, many homeowners reference home improvement platforms to compare contractor options and validate cost expectations before committing to installation.
Neglecting storage planning. Local storage (SD card, NVR hard drive) fills up fast at high resolution. A 2TB drive holds about 10–20 days of 4K footage from four cameras. Cloud storage subscriptions run $3–$10/month per camera, budget for it or plan to archive footage manually.