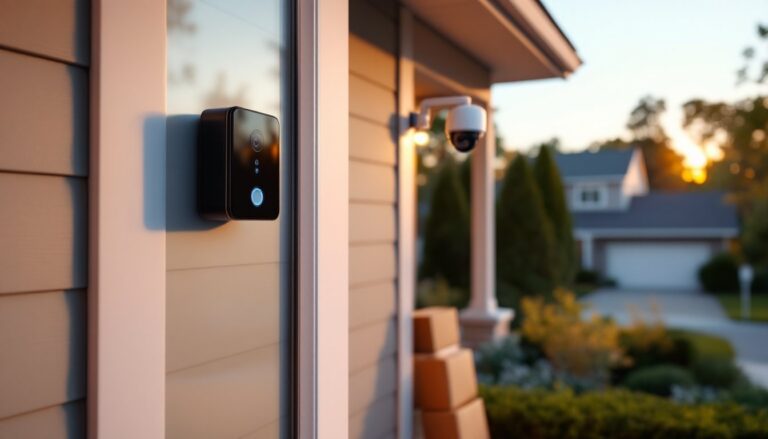
Hardwired security cameras offer reliability that Wi-Fi systems can’t match, no dropped signals, no bandwidth bottlenecks, and no monthly cloud storage fees eating into your budget. But running cables through walls, matching voltage requirements, and terminating connections properly can turn a weekend project into a multi-day headache if you don’t know what you’re doing. This guide walks through everything needed to wire a security camera system like a pro, from choosing the right cable type to fishing wires through finished walls without punching unnecessary holes. Whether installing a single camera at the front door or a multi-camera system covering the entire property, proper wiring technique makes the difference between a clean, code-compliant installation and a troubleshooting nightmare.
Table of Contents
ToggleKey Takeaways
- Hardwired security camera wiring eliminates dropped signals and monthly cloud storage fees, offering superior reliability compared to Wi-Fi systems when properly installed.
- PoE (Power over Ethernet) systems simplify security camera wiring by combining power and data in a single Cat5e or Cat6 cable, supporting runs up to 328 feet without signal loss.
- Proper cable termination, adequate spacing from AC wiring, and consistent labeling are critical to avoid electromagnetic interference and ensure years of reliable performance.
- Using solid copper cables, maintaining correct staple pressure, and installing drip loops on exterior cameras prevents voltage drop, signal degradation, and water damage.
- Plan cable routes carefully with 20% extra length for routing obstacles, test connections before closing walls, and verify local codes for permits and fire-rated cable requirements in plenum spaces.
Understanding Security Camera Wiring Basics
Security camera wiring boils down to two core components: power delivery and data transmission. Some systems combine both in a single cable, while others require separate runs.
Power over Ethernet (PoE) cameras use a single Cat5e or Cat6 cable to deliver both power and data, simplifying installation and reducing cable clutter. The camera connects to a PoE switch or NVR (network video recorder) that supplies up to 15.4 watts per camera on standard PoE (802.3af) or up to 30 watts on PoE+ (802.3at) for cameras with heaters, pan-tilt motors, or higher power draws.
Traditional analog cameras (CCTV/coax systems) require separate RG59 coaxial cable for video signal and an additional 18/2 power cable for low-voltage DC power, typically 12V or 24V. The coax connects to a DVR (digital video recorder), while power cables run to a centralized transformer or individual plug-in adapters.
Voltage drop matters on longer runs. For 12V DC cameras, runs exceeding 50 feet may require stepping up to 16-gauge power wire or switching to 24V cameras to maintain adequate voltage at the camera. PoE systems handle runs up to 328 feet (100 meters) without signal degradation, making them ideal for larger properties.
Most jurisdictions classify security camera wiring as low-voltage work, which typically doesn’t require an electrical license but may still require permits for in-wall installations. Check local codes before starting.
Types of Security Camera Wiring Systems
PoE (Power over Ethernet) systems dominate modern installations. They use standard Cat5e or Cat6 Ethernet cable with RJ45 connectors. Image quality reaches 4K or higher, and cameras can be managed remotely through network interfaces. Installation requires a PoE-capable switch or injector, but eliminates separate power supplies. Best for new installations or homes with existing structured wiring.
Coax/Analog (CCTV) systems run RG59 or RG6 coaxial cable paired with separate 18/2 power wire. Traditional analog cameras max out at lower resolutions, but newer HD-TVI, HD-CVI, and AHD systems push coax to 1080p or 4K over the same cable types. These work well when retrofitting existing coax runs or when budget constraints favor cheaper cameras. The separate power cable adds labor time during installation.
Wireless cameras technically still need wiring, just for power, not data. They transmit video over Wi-Fi but require a constant 120V AC outlet or low-voltage power run. “Wireless” is a misnomer unless running on batteries, which introduces maintenance cycles for recharging or replacement. Not truly wireless, but reduces cable count.
Hybrid systems combine wired and wireless cameras on a single NVR or management platform. Useful when certain camera locations make cable runs impractical but core security zones benefit from hardwired reliability. Modern home security systems often integrate hybrid setups to balance coverage and installation effort.
Tools and Materials You’ll Need
Cables and Connectors:
- Cat5e or Cat6 cable (for PoE): 1,000-foot pull box, solid copper conductors (not CCA, copper-clad aluminum)
- RG59 Siamese cable (for analog): combined coax and 18/2 power in single jacket
- RJ45 connectors and crimp tool (for PoE terminations)
- BNC connectors and compression tool (for coax systems)
Installation Tools:
- Fish tape or glow rods (fiberglass recommended for tight wall cavities)
- Flexible drill bit (54-inch or longer for drilling through top plates)
- Paddle bit set (¾-inch for single cables, 1-inch for multiple)
- Cable staples (insulated, low-voltage rated, do not overtighten)
- Stud finder (essential for avoiding framing members and existing wiring)
- Voltage tester (to verify no live AC circuits in work area)
Finishing Supplies:
- Low-voltage mounting brackets or old-work boxes (single-gang for wall penetrations)
- Cable raceways or conduit (when surface-mounting in garages or basements)
- Silicone caulk (for sealing exterior penetrations)
- Fire-rated sealant (required in some jurisdictions for through-wall penetrations)
Safety Gear:
- Safety glasses (mandatory when drilling overhead)
- Dust mask (attic insulation contains irritants)
- Work gloves (for handling sharp cable ends and insulation)
- Headlamp (keeps both hands free in attics and crawlspaces)
Invest in a cable tester (around $30 for basic PoE testers) to verify continuity and proper pinout before mounting cameras. Troubleshooting after drywall repair wastes time and money.
Step-by-Step Wiring Installation Process
1. Plan the camera locations and cable routes. Mark camera mounting points with painter’s tape. Measure the distance from each camera to the NVR/DVR location, adding 20% extra for routing around obstacles and service loops. Avoid running security cables parallel to AC wiring for more than a few feet to prevent electromagnetic interference.
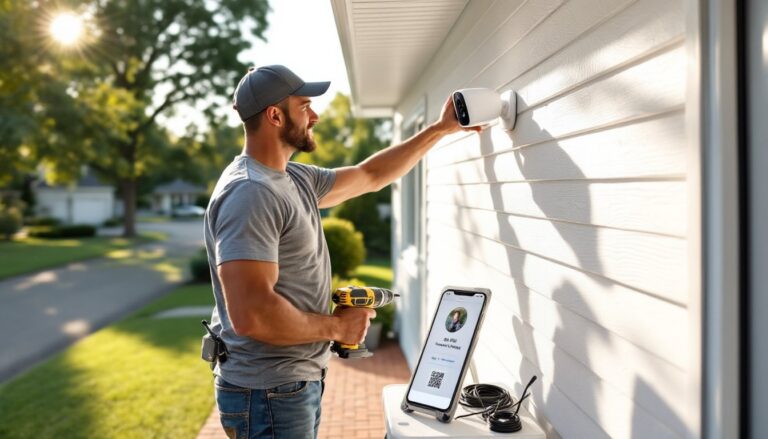
2. Drill entry and exit holes. For exterior cameras, drill a ¾-inch hole through the exterior wall at a slight downward angle (prevents water intrusion). Use a long flexible drill bit to bore through the top plate from the attic when running cables down interior walls. In finished basements, drill up through the bottom plate from below.
3. Fish cables to camera locations. Attach cable to fish tape or glow rods using electrical tape (wrap several times to prevent snags). Work with a partner when possible, one person feeds cable while the other guides the fish tape. Leave 12-18 inches of extra cable at each camera location for termination and adjustments. Professional installers often follow detailed installation procedures to ensure code compliance and clean results.
4. Terminate connections. For PoE cameras, strip back the Cat6 jacket 1.5 inches, untwist pairs minimally (excessive untwisting causes crosstalk), and arrange wires in T568B order (orange-white, orange, green-white, blue, blue-white, green, brown-white, brown). Insert fully into RJ45 connector and crimp firmly. For coax systems, strip RG59 to expose ½-inch of center conductor, slide on BNC connector, and compress with the appropriate tool.
5. Mount cameras and secure cables. Use cable staples every 16-24 inches on vertical runs, every 36 inches on horizontal runs in attics. Do not staple so tight that you crush the cable jacket, this damages internal conductors. Secure outdoor cables with UV-resistant cable clips.
6. Test before buttoning up. Connect each camera to the NVR/DVR and verify live video feed. Adjust camera angles, then seal exterior penetrations with silicone caulk. In areas with cold winters, use paintable exterior-grade caulk rated for temperature extremes.
Running Cables Through Walls and Attics
Attic runs offer the easiest path for most installations. Navigate to the approximate camera location using the attic floor joists (which correspond to interior walls below). Drop a weighted string or small chain down the wall cavity after drilling through the top plate. Attach cable to the string and pull upward from the attic.
For two-story installations, identify a plumbing or HVAC chase that runs from basement to attic. These vertical shafts often provide pre-existing pathways, though you may encounter fire blocking (horizontal framing members). Drill through fire blocks with a flexible bit, then seal penetrations with intumescent fire caulk to maintain the wall’s fire rating.
When running cables across an attic, lay them along the top of joists rather than in the insulation. This prevents heat buildup (which can degrade cable over time) and makes future troubleshooting easier. Use cable trays or J-hooks in commercial installations or if local code requires it.
Exterior surface-mounting simplifies difficult runs but looks less professional. Run cable inside ½-inch PVC conduit painted to match the siding. Secure conduit with appropriate clips every 3 feet. This approach works well for retrofits on brick, stone, or stucco where fishing walls is impractical. For projects requiring extensive wiring in finished spaces, some homeowners prefer to hire professionals found through contractor matching services to minimize drywall repair.
Common Wiring Mistakes to Avoid
Using CCA (copper-clad aluminum) cable instead of solid copper saves a few dollars but causes voltage drop and connectivity issues on longer PoE runs. CCA fails PoE standards and may not power cameras reliably beyond 75 feet. Always verify “solid copper” or “pure copper” on the cable jacket.
Mixing cable types creates compatibility headaches. Cat5e works fine for most security cameras, but mixing Cat5e and Cat6 on the same run or using different brands with varying twist rates can cause impedance mismatches. Stick with one cable type from a single manufacturer for the entire installation.
Crushing cables with staples or zip ties damages the internal wire pairs, degrading signal quality. Low-voltage staples should hold cable snugly without deforming the jacket. If you can slide the cable through the staple with light resistance, it’s correctly installed.
Ignoring fire-rated cable requirements in plenum spaces (areas used for air circulation like dropped ceilings or HVAC returns) violates building codes in most jurisdictions. Plenum-rated cable (marked CMP) uses fire-retardant jacket materials that produce less smoke. Standard riser-rated (CMR) or general-use (CM) cable is not acceptable in plenums. Inspectors will flag this during final walkthroughs.
Skipping drip loops on exterior cameras invites water damage. Before cable enters the wall or camera housing, form a U-shaped loop that hangs lower than the entry point. Water follows gravity down the cable and drips off the loop instead of seeping into connections.
Running security cables parallel to AC wiring for extended distances induces interference, especially with analog systems. Maintain at least 6 inches of separation from AC lines. When crossings are unavoidable, cross at 90-degree angles to minimize interference.
Failing to label both ends of every cable run turns troubleshooting into guesswork. Use a label maker or write on masking tape with permanent marker to identify each cable at the camera end and at the NVR/DVR termination. Include camera location and date of installation. When upgrading security camera systems years later, proper labeling saves hours of cable tracing. Experienced DIYers often reference expert installation guides for additional tips on avoiding common pitfalls.
Conclusion
Wiring security cameras requires methodical planning, the right materials, and attention to detail, but it’s well within reach for DIYers comfortable with basic tools and working in attics or crawlspaces. Proper cable selection, clean terminations, and code-compliant installation practices ensure a system that performs reliably for years. Take time on the prep work, test every connection before closing up walls, and don’t skip safety gear when working overhead or handling power tools.