Security cameras used to need two things: power and WiFi. Not anymore. SIM card security cameras operate on cellular networks, letting homeowners monitor properties without running ethernet cables or depending on unstable home internet. They’re showing up at construction sites, vacation cabins, detached garages, and anywhere hardwired connectivity isn’t practical. This guide breaks down how these cellular-enabled cameras work, what to look for when buying one, and how to install them yourself without hiring an integrator.
Table of Contents
ToggleKey Takeaways
- SIM card security cameras operate on cellular networks (4G LTE or 5G), eliminating the need for WiFi or ethernet cables and providing reliable monitoring even when home internet fails.
- A SIM card security camera requires a compatible data plan ($10–$25/month), optional cloud storage ($3–$10/month), and works with all major U.S. carriers and MVNOs by inserting a nano-SIM card.
- Optimal placement at 8–10 feet height with overlapping camera views, avoiding backlighting, and positioning at 45° angles to entry points maximizes facial recognition and prevents blind spots.
- Battery-powered models last 2–6 months per charge, while solar panel setups can run indefinitely in areas with 4+ hours daily sunlight, making them ideal for remote locations without infrastructure.
- Choose cameras with IP65+ weather ratings, multi-band LTE compatibility, adjustable video quality, and motion-based recording to balance security needs with data consumption under 10 GB monthly.
- A fully wireless solar-powered setup costs $200–$300 per camera plus recurring fees, making it more economical than traditional wired systems for 1–3 remote monitoring locations.
What Is a SIM Card Security Camera and How Does It Work?
A SIM card security camera houses a cellular modem and accepts a standard nano-SIM card, the same type used in smartphones. Instead of connecting to a WiFi router, the camera transmits video data over 4G LTE or 5G cellular networks. The camera captures footage, compresses it, and uploads clips or streams to cloud storage or a mobile app via the carrier’s data network.
Most models support major carriers (AT&T, Verizon, T-Mobile) as well as MVNOs (mobile virtual network operators) that piggyback on those networks. You’ll need an active data plan, either from your existing carrier or a third-party IoT (Internet of Things) provider. The camera authenticates on the network just like a phone, using the SIM’s credentials.
Power requirements vary. Some cameras run on rechargeable lithium batteries (10,000–20,000 mAh typical) that last 2–6 months depending on activity and settings. Others require wired power via a weatherproof AC adapter or solar panel accessory. Battery models enter a low-power standby mode and wake on motion detection to conserve charge.
Video resolution ranges from 1080p to 4K, but higher resolution burns through data faster. Most manufacturers recommend 1080p for cellular use to keep data consumption under 10 GB per month with moderate recording. Compression codecs like H.265 (HEVC) help reduce file sizes by up to 50% compared to older H.264 standards.
Key Benefits of Using SIM Card Security Cameras for Your Home
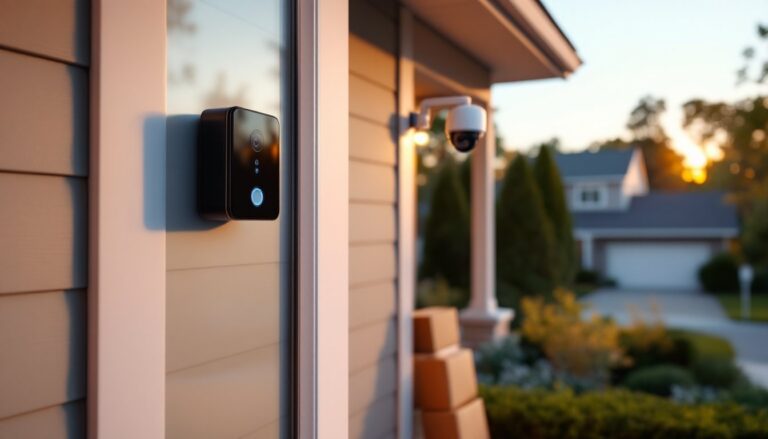
No reliance on home internet. If your router goes down, gets unplugged, or suffers a power outage, WiFi cameras go blind. Cellular cameras stay online as long as the carrier network has coverage. This makes them harder to disable by cutting landlines or jamming WiFi signals, a tactic burglars increasingly use.
Remote location monitoring. Barns, sheds, RVs, boat docks, and gate entrances often sit too far from the main house for WiFi extenders. Cellular cameras cover these gaps without trenching conduit for ethernet or fiber. They’re also popular for monitoring rental properties, Airbnbs, or job sites where installing infrastructure isn’t feasible.
Faster setup. No need to configure router settings, open firewall ports, or troubleshoot DHCP conflicts. Pop in a SIM, mount the camera, and scan a QR code with the app. Most users finish installation in under 20 minutes.
Failover redundancy. Some advanced systems include both WiFi and cellular radios. The camera connects via WiFi by default to save data costs, then automatically switches to cellular if WiFi drops. This hybrid approach combines cost efficiency with bulletproof uptime.
True Wireless Freedom Without WiFi Dependency
Cellular cameras cut the cord entirely when paired with solar panels or large-capacity batteries. A 20W solar panel can keep a camera running indefinitely in areas with 4+ hours of daily sunlight, even during winter. This setup works well for perimeter monitoring along fence lines, driveway gates, or wooded property boundaries where running power lines would cost thousands.
Battery-only models suit locations with seasonal use, hunting blinds, summer cottages, or construction trailers. Swap or recharge batteries every few months instead of maintaining year-round infrastructure. For everyday home security systems, understanding the broader landscape of wired options helps homeowners decide when cellular truly beats traditional connectivity.
Choosing the Right SIM Card Security Camera: Essential Features to Consider
Network compatibility. Verify the camera supports your carrier’s LTE bands. U.S. carriers use different frequency ranges: Verizon relies heavily on bands 13 and 4, AT&T uses bands 12 and 17, T-Mobile favors bands 71 and 41. A camera that works on one network may get poor signal or no service on another. Look for multi-band radios that cover all major carriers.
Data efficiency. Continuous streaming can consume 100+ GB per month. Choose cameras with adjustable video quality settings and smart detection that only records when motion or people are detected. Features like local pre-buffering (storing a few seconds before motion triggers) and scheduled recording windows help control data usage.
Weather resistance. Outdoor cellular cameras should carry an IP65 or IP66 rating minimum, indicating dust-tight construction and protection against heavy rain. IP67 models handle temporary submersion. Check that battery compartments and SIM slots have gasket seals, water intrusion kills electronics fast.
Night vision range. Infrared LEDs illuminate up to 50–100 feet in complete darkness on quality models. Cheaper cameras max out at 20–30 feet, which barely covers a driveway. Some premium units offer color night vision using ambient light sensors and image processing, though this drains batteries faster.
Two-way audio. Built-in microphones and speakers let you communicate with delivery drivers, warn off trespassers, or calm a spooked pet. Audio quality varies wildly, test it before mounting the camera 20 feet up a pole.
Storage options. Most cellular cameras upload to cloud storage ($3–$10/month per camera), but some include microSD card slots (up to 256 GB) for local backup. Local storage continues recording even during network outages, though you’ll need physical access to review footage. Many modern security camera systems now offer hybrid storage to balance convenience and reliability.
Setting Up Your SIM Card Security Camera: A DIY Installation Guide
1. Activate the SIM card. Purchase a data plan and SIM before unboxing the camera. Insert the nano-SIM into your phone first to confirm it activates and gets a signal at the install location. Some carriers require you to register the SIM’s IMEI number: do this ahead of time to avoid headaches.
2. Charge or install batteries. Fully charge rechargeable batteries before first use, this can take 6–12 hours. If using solar, mount the panel facing true south (in the Northern Hemisphere) at a 30–45° angle for optimal year-round charging.
3. Insert the SIM and power on. Open the camera’s weatherproof SIM tray (usually behind a rubber flap), slide in the nano-SIM, and seal it. Power on the camera. LEDs will indicate cellular connection status: solid blue or green means connected, blinking red means searching for signal.
4. Download the app and pair. Scan the camera’s QR code with the manufacturer’s app (iOS or Android). Follow prompts to connect the camera to your account. You’ll set a device name, configure motion zones, and adjust sensitivity. Test recording and playback before mounting.
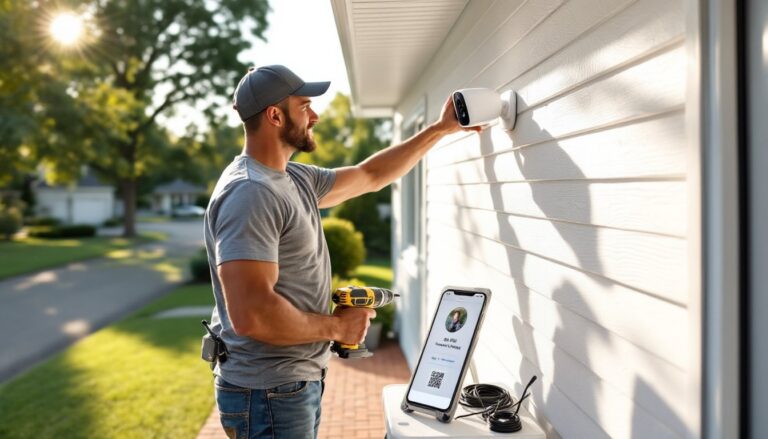
5. Mount the camera. Use a drill, masonry bits (for brick/concrete), and stainless steel lag screws for permanent mounts. Wood siding accepts #10 × 2.5-inch exterior-grade screws into studs or blocking. Aim for 8–10 feet height, high enough to avoid tampering but low enough to capture faces clearly. Tilt the camera down 15–20° to reduce sky glare.
6. Optimize the signal. If bars are low, relocate the camera a few feet or rotate it. Cellular signals reflect off metal roofs and penetrate wood better than brick. An external antenna (if the camera supports one) can boost reception in fringe areas.
7. Set detection zones. Use the app to draw boxes around driveways, doors, or pathways. Exclude trees, busy roads, and flag poles, they trigger false alerts. Most cameras let you set different sensitivity levels for day and night.
Safety note: Wear safety glasses when drilling overhead, and use a sturdy ladder with a helper to steady it. Check local building codes: some jurisdictions require permits for cameras aimed at public sidewalks or neighboring property.
Cost Considerations: Data Plans and Ongoing Expenses
Data plans are the biggest recurring cost. Expect to pay $10–$25 per month per camera for 5–20 GB of 4G LTE data. Some camera manufacturers offer bundled plans at discounted rates ($8–$12/month), while others let you bring your own SIM from carriers like Mint Mobile, US Mobile, or Google Fi. Review independent comparisons on sites like Digital Trends to see which models pair well with budget MVNOs.
Cloud storage adds another $3–$10/month per camera for 7–30 days of rolling footage. A few brands include limited free storage (usually 24 hours), but serious monitoring needs paid tiers. Calculate total cost over two years: a $120 camera with $15/month in combined data and cloud fees costs $480 total.
Hardware accessories can push initial investment higher. A 20W solar panel runs $40–$80, extended batteries cost $25–$50, and heavy-duty mounts add $15–$30. Budget $200–$300 per camera for a fully wireless, solar-powered setup.
Electricity costs for wired models are negligible, about $2–$4 per year at typical U.S. rates. Battery-powered units save on wiring but require periodic recharging or replacement every 2–4 years ($30–$60 per battery pack).
Compare these figures against traditional wired systems that need no monthly fees but cost $500–$1,500 upfront for NVR (network video recorder) hardware and professional installation. Cellular cameras make sense for 1–3 remote locations: larger systems may justify the upfront investment in wired infrastructure.
Best Placement Strategies for Maximum Security Coverage
Entry points first. Mount cameras to cover front doors, back doors, and garage entries. Position them at a 45° angle to the door, not head-on, this captures faces as people approach rather than the tops of their heads.
Overlap fields of view. A single camera rarely covers an entire property. Place units so motion detected by one camera stays visible in another’s frame as the subject moves. This continuity helps track intruders and reduces blind spots.
Elevate for perspective. Install cameras 8–12 feet high to prevent easy tampering and expand the field of view. Too high (15+ feet) and facial details blur: too low (under 6 feet) and hats or hoodies obscure faces. When evaluating top-rated security camera models for installation, always consider the optimal mounting height for each unit’s lens angle.
Avoid backlight. Don’t aim cameras directly at bright lights, sunrise, or sunset. The exposure will darken foreground subjects into silhouettes. Use the app’s WDR (wide dynamic range) setting if available, but repositioning the camera 10° often solves the problem.
Test cellular signal at each location. Walk the property with your phone on the same carrier, checking signal bars. Cameras perform best with 3–4 bars: 1–2 bars cause choppy video and upload failures. Metal buildings, dense foliage, and terrain all affect reception.
Protect the camera itself. Secure mounting brackets with tamper-resistant Torx or hex screws instead of standard Phillips heads. Some housings accept small padlocks on battery compartments. Cable locks (like those for bicycles) can anchor the entire camera to a post or railing as a secondary deterrent.
Check local laws. Recording audio requires two-party consent in some states. Cameras aimed at neighbors’ yards or public streets may violate privacy ordinances. Review your jurisdiction’s surveillance laws or consult local code enforcement before finalizing placement. Independent reviews on CNET and Tom’s Guide often note legal considerations for specific camera models and their features.