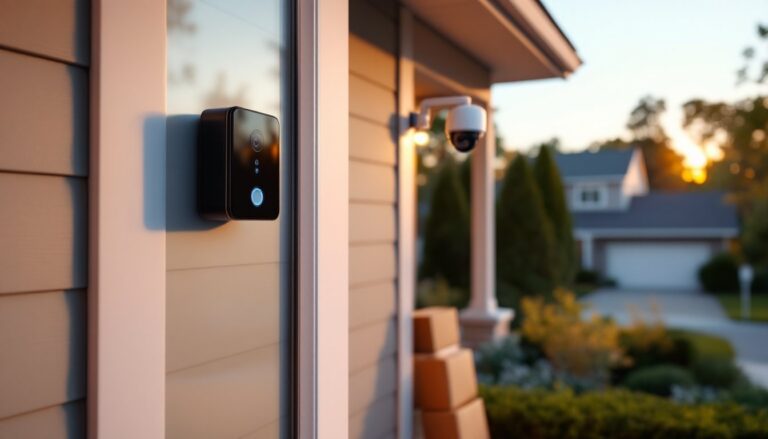
Running power lines to every corner of your property is expensive, time-consuming, and sometimes impossible. Solar-powered security cameras eliminate that headache entirely, offering flexible placement without trenching or hiring an electrician. These systems harvest sunlight to keep batteries charged, providing continuous monitoring even in remote spots like detached garages, gate entries, or the back forty of a rural lot. With modern panel efficiency and battery tech, they’ve moved from novelty to practical tool for serious home security.
Table of Contents
ToggleKey Takeaways
- Solar panels for security cameras eliminate wiring costs and installation complexity while enabling flexible placement in remote or hard-to-reach areas of your property.
- A 10,000–13,000mAh battery paired with a quality charge controller provides 2–4 months of standby power and requires 4–6 hours of direct daily sunlight for continuous operation.
- Mount solar panels south-facing (Northern Hemisphere) at a 30–40 degree tilt, position cameras 8–10 feet high, and maintain cable runs under 20 feet to minimize voltage loss and ensure reliable charging.
- Motion detection zones, PIR sensors, and weatherproofing rated IP65 or higher are essential features for reducing false alerts and protecting equipment in outdoor conditions.
- Common issues like battery drain, poor connectivity, and charging failures are typically resolved by adjusting motion sensitivity, adding a Wi-Fi extender, cleaning panels monthly, and verifying cable connections and dielectric grease weatherproofing.
Why Choose Solar-Powered Security Cameras for Your Home
Solar-powered cameras solve three major pain points: wiring logistics, ongoing power costs, and installation flexibility.
First, you avoid the electrical code requirements that come with hardwired outdoor cameras. No conduit runs, no junction boxes, no permit applications in most jurisdictions. That alone saves hundreds in materials and labor if you’d otherwise hire out the work.
Second, these systems operate off-grid. Power outages don’t kill your surveillance. If someone cuts your main breaker, the camera keeps recording. That independence matters most for perimeter monitoring where utility access doesn’t exist, think long driveways, outbuildings, or property lines backing onto wooded areas.
Third, repositioning is trivial. Decide the driveway angle isn’t right? Unbolt the mount, move it ten feet, done. Try that with a wired camera and you’re rerunning cable or living with a compromised view.
The trade-off: solar cameras need 4–6 hours of direct sunlight daily to maintain full-time operation. Heavily shaded locations or climates with extended overcast periods require larger panels or backup charging plans.
How Solar Panels for Security Cameras Actually Work
The system has three components: the camera unit with integrated battery, the solar panel, and a charge controller (usually built into one or both pieces).
The solar panel converts sunlight into DC electricity, typically at 5V to 6V output for small camera systems. Panel wattage ranges from 3W to 10W, enough to trickle-charge a lithium-ion or lithium-polymer battery pack inside the camera housing.
The charge controller prevents overcharging and regulates voltage. Cheaper units skip this and risk battery degradation: quality systems include it as standard. Some controllers also manage Maximum Power Point Tracking (MPPT), which extracts more energy from the panel under variable light conditions, though it’s overkill for small residential setups.
The battery stores surplus energy for nighttime operation and cloudy days. Capacities run from 5,000mAh to 15,000mAh in consumer models. A 10,000mAh battery typically provides 2–4 months of standby power without sunlight, assuming the camera only records on motion detection rather than continuous streaming.
Panels connect via weatherproof cables, usually 10–15 feet long. Mounting hardware lets you angle the panel independent of the camera, critical for optimizing sun exposure. Install the panel facing south (in the Northern Hemisphere) at a tilt roughly equal to your latitude for year-round efficiency. A 30–40 degree tilt works for most of the continental U.S.
Key Features to Look for in a Solar Panel Security Camera System
Video resolution should be at least 1080p: 2K or 4K models deliver clearer license plate or facial detail but consume more battery per recording. Balance resolution with how often you review footage, most break-ins get solved with clear stills, not cinematic pans.
Motion detection zones let you exclude high-traffic areas like sidewalks to reduce false alerts. PIR (passive infrared) sensors detect body heat and are more accurate than pixel-change algorithms, which trigger on swaying branches or passing shadows.
Night vision range of 25–30 feet covers most residential yards. Infrared LEDs illuminate without visible light, though color night vision (using ambient light or a spotlight) provides better suspect identification. Some cameras toggle between modes automatically.
Two-way audio is useful for gate intercoms or warning off package thieves, but adds battery drain. If you enable it, expect to recharge or supplement solar input more frequently.
Weatherproofing must meet at least IP65 rating, dust-tight and protected against water jets. Coastal or high-humidity areas should aim for IP66 or IP67. Check that both the camera and panel carry the rating: some bundles skimp on the panel enclosure.
Local vs. cloud storage: MicroSD slots allow offline recording (look for 64GB or 128GB capacity), while cloud subscriptions add recurring costs but enable remote access. Many systems offer both: use local for bulk storage and cloud for real-time alerts.
Battery Capacity and Backup Power
A 10,000–13,000mAh battery is the sweet spot for moderate climates. Cameras recording 20–30 motion events daily will drain roughly 10–15% of capacity in 24 hours, leaving ample reserve.
In regions with winter cloud cover, Pacific Northwest, upper Midwest, Northeast, budget for a larger battery (15,000mAh+) or plan to USB-charge quarterly. Some manufacturers sell auxiliary battery packs that clip onto the camera mount, effectively doubling runtime.
Charging speed matters if you’re supplementing solar with manual top-ups. A 5V/2A input fills a 10,000mAh battery in 6–8 hours via USB adapter.
Some advanced units allow dual-panel inputs, pairing two small panels to double collection in shady locations. Check that the charge controller supports parallel wiring without voltage conflicts.
Best Locations to Install Your Solar-Powered Security Camera
South-facing eaves (Northern Hemisphere) are ideal. Mount the camera under the soffit for weather protection, then position the panel 6–8 feet away on the roof edge or a pole where it catches unobstructed midday sun. Use the included extension cable or upgrade to a longer one if needed.
Driveway gates and property entries are prime spots. If the gate post sits in shade, mount the camera there but run the panel cable to a nearby fence top or dedicated post in the open. Keep the cable run under 20 feet to minimize voltage drop, most systems tolerate up to 25 feet, but efficiency falls off beyond that.
Detached garages and sheds benefit most from solar setups since trenching power is cost-prohibitive. Homeowners with smart home technology often integrate these cameras into broader security ecosystems. Aim for 8–10 feet off the ground to avoid tampering but stay within reach for occasional lens cleaning.
Avoid:
- Under tree canopy, even if it looks sunny. Seasonal foliage will block panels six months a year.
- North-facing walls (Northern Hemisphere), they receive minimal direct sun except at summer solstice.
- Within sprinkler range, constant water spray fogs lenses and degrades seals faster than rain alone.
Security tip: Position cameras to overlap coverage. If someone disables one, the adjacent unit captures the approach. Pair solar cameras with traditional residential security camera systems for layered protection on high-value entry points like front doors and garage bays.
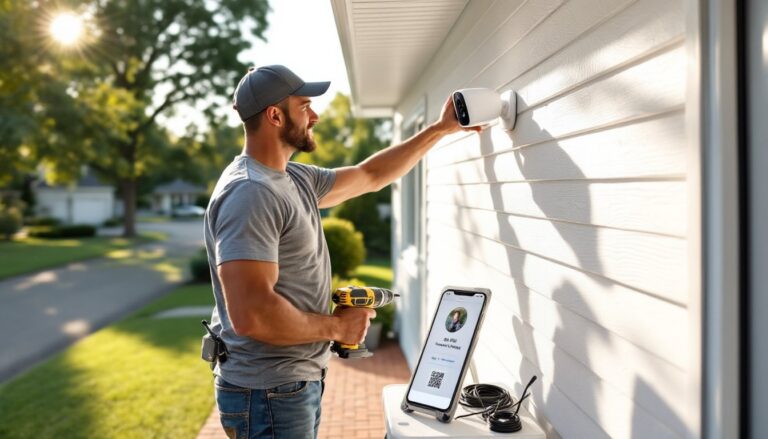
DIY Installation: Step-by-Step Setup Guide
Tools and Materials:
- Drill with masonry or wood bits (depending on substrate)
- 3/16″ or 1/4″ concrete anchors if mounting to brick/block
- #10 stainless steel screws for wood siding
- Level (2-foot or 4-foot)
- Phillips and flathead screwdrivers
- Ladder rated for your weight plus 50 lbs
- Pencil and painter’s tape
- Safety glasses and work gloves
Installation Steps:
-
Charge the camera battery fully via USB before first use. This baseline charge ensures the system boots correctly and pairs with your app.
-
Test camera placement temporarily. Use painter’s tape or a helper to hold the mount in position while you check the view angle in the app. Confirm motion zones cover target areas and the lens isn’t pointed into direct sun (causes glare and overheating).
-
Mark mounting holes. Hold the bracket against the surface, level it, and mark screw locations with a pencil. For masonry, mark pilot holes 1/4″ smaller than anchor diameter.
-
Drill pilot holes. Wood siding: 1/8″ pilot holes prevent splitting. Brick or stucco: use a masonry bit at low speed with light pressure to avoid cracking. Clear dust with compressed air.
-
Attach the mount. Drive screws until snug, but don’t overtighten and strip the holes. For block or brick, tap anchors flush with the surface before inserting screws.
-
Mount the solar panel within 10–15 feet of the camera, angling it south at 30–40 degrees. Seasonal homeowner maintenance includes adjusting tilt in spring and fall for sun angle changes. Use the same mounting process, level, mark, drill, secure.
-
Run the charging cable from panel to camera. Secure it with cable clips every 18–24 inches along the run. Avoid sharp bends that crimp the wire. Leave a small drip loop at the camera connection so water doesn’t run into the port.
-
Snap the camera into the mount and connect the solar cable. Most systems lock with a quarter-turn or spring clip. Ensure the charging indicator LED lights up (usually red or blue).
-
Configure the app: Set motion sensitivity, detection zones, notification preferences, and recording schedule. Enable two-factor authentication if available.
Do not attempt this if:
- Your mounting surface is load-bearing structural brick (hire a mason to assess).
- The install requires working near power lines (call a licensed electrician).
- You’re uncomfortable on a ladder above 10 feet.
Troubleshooting Common Solar Panel Camera Issues
Battery drains faster than expected:
Check that motion sensitivity isn’t set too high, constant false triggers kill battery life. Review your event log: if you’re recording 100+ clips daily, dial back sensitivity or narrow detection zones. Real-world tests show that cameras recording long-term in outdoor conditions often require zone adjustments after the first week.
Verify the panel gets 4+ hours of direct sun. Partial shade from a roof edge or fence post reduces output by 50–70%. Relocate the panel or trim obstructions.
Cold weather slows lithium battery chemistry. Below 32°F, capacity drops 10–20%. This is normal: performance recovers when temps rise.
Camera goes offline randomly:
Weak Wi-Fi is the usual culprit. Solar cameras mount farther from routers than wired units. Add a weatherproof Wi-Fi extender or upgrade to a mesh system if signal strength drops below -70 dBm (check in the app’s settings).
Firmware bugs also cause dropouts. Enable auto-updates or manually check for patches quarterly. Manufacturers often release fixes for connectivity issues after launch.
Solar panel not charging:
Inspect the cable connection, corrosion or moisture in the port blocks current. Disconnect, dry thoroughly, and apply a dab of dielectric grease to weatherproof the contact. Reconnect firmly.
Clean the panel surface. Dust, pollen, and bird droppings cut efficiency by 15–25%. Wipe with a damp microfiber cloth monthly, or after storms.
If the charge controller fails, the panel may output voltage but not actually charge the battery. Test panel output with a multimeter (should read 5–6V in sunlight). If voltage is present but the battery stays flat, the controller is likely fried, contact the manufacturer for warranty service.
Night vision looks washed out or too dark:
IR LEDs reflect off nearby surfaces (like white siding or metal sheds) causing glare. Angle the camera slightly away or apply black electrical tape to the edges of the LED array to narrow the beam.
If the image is too dim, the infrared LEDs may be underpowered for the distance. Most cameras cover 25 feet max: beyond that, add a separate IR illuminator (they draw minimal power and can run off the same solar setup with a splitter cable).
App won’t connect during initial setup:
Ensure your phone is on the 2.4 GHz Wi-Fi band, not 5 GHz. Most camera hardware only supports 2.4 GHz for better range. Temporarily disable 5 GHz in your router settings if it auto-switches bands.
Move closer to the camera during pairing, initial setup often requires proximity. Once paired, you can control it from anywhere.
For additional home security camera troubleshooting and integration tips, especially when mixing solar and wired systems, consult manufacturer-specific guides or your security system’s support resources.
Safety note: Never open the camera housing or solar panel enclosure while charged. Lithium batteries can vent or ignite if punctured. If you suspect internal damage, power down and contact the manufacturer.