Installing a security camera DVR system isn’t just about mounting cameras and hoping for the best, it’s about creating a reliable surveillance network that actually works when something goes sideways. DVR (Digital Video Recorder) systems remain a go-to choice for homeowners who want wired reliability, better low-light performance, and straightforward setup without wrestling Wi-Fi dead zones. Whether someone’s securing a detached garage, monitoring entry points, or keeping tabs on a backyard workshop, a DVR system delivers dependable footage without monthly cloud fees. This guide walks through everything needed to choose, install, and troubleshoot a DVR security camera setup that fits a home’s specific layout and security needs.
Table of Contents
ToggleKey Takeaways
- A security camera DVR system uses wired analog cameras and coaxial cabling to deliver reliable surveillance without Wi-Fi dependency or monthly cloud fees.
- DVR systems excel in low-light performance, offer faster installation than NVR alternatives, and support cable runs up to 300 feet without signal degradation.
- When choosing a DVR security camera system, prioritize channel count (with extra capacity for future cameras), storage needs based on resolution and retention, and remote viewing capabilities.
- Proper installation requires careful planning of cable routes, consistent 18-24 inch cable securing, and a minimum 2-inch bend radius to prevent coaxial cable damage.
- Most DVR troubleshooting issues stem from loose BNC connections, inadequate power supply voltage (11.5V minimum), or excessive cable run lengths without amplification.
What Is a DVR Security Camera System and How Does It Work?
A DVR security camera system consists of analog cameras wired directly to a central recording unit that processes and stores video footage. Unlike network-based systems, DVR setups use coaxial cable (typically RG59 or RG6) to transmit video signals from each camera back to the recorder.
The DVR unit converts analog signals into digital format, compresses the footage, and stores it on an internal hard drive, commonly ranging from 1TB to 8TB depending on recording quality and retention needs. Most modern DVR systems support 720p to 4K resolution through HD-TVI, HD-CVI, or AHD technology, which pushes high-definition video over traditional coaxial cabling.
Power delivery typically happens via separate 12V DC power adapters at each camera location, though some installers opt for a centralized power distribution box in the DVR location to simplify wiring. The recorder connects to a home network via Ethernet, enabling remote viewing through mobile apps or web browsers.
One key advantage: DVR systems don’t rely on home Wi-Fi bandwidth. Once cameras are wired, they deliver consistent footage quality regardless of network traffic, making them ideal for homes with spotty wireless coverage or heavy streaming activity.
Key Benefits of Installing a DVR System in Your Home
Reliability tops the list. Wired connections eliminate the dropouts and interference common with wireless cameras. There’s no fighting with signal strength or worrying about a neighbor’s new router knocking cameras offline.
Cost-effectiveness follows close behind. DVR systems generally cost less upfront than comparable NVR setups, and there are no mandatory cloud storage subscriptions. Footage stays local on the DVR’s hard drive, accessible anytime without monthly fees.
Low-light performance shines with most DVR-compatible cameras. Many analog and HD-TVI cameras feature larger image sensors and better infrared arrays than budget IP cameras, delivering clearer nighttime footage, crucial for identifying faces or license plates in dim conditions.
Simpler troubleshooting matters when something breaks. With DVR systems, problems usually trace to a cable connection, power supply, or camera hardware. There’s no wrestling with IP address conflicts, firmware mismatches, or network authentication issues that plague more complex digital systems.
Longer cable runs work without signal degradation. Coaxial cable reliably carries video signals up to 300 feet (500+ feet with powered baluns), while many IP cameras struggle beyond 100 meters on standard Ethernet without switches or extenders.
DVR vs. NVR: Which Security System Is Right for Your Home?
DVR systems use analog cameras with coaxial cabling. They’re ideal for homes with existing coax infrastructure, tighter budgets, or areas where running Ethernet isn’t practical. Installation often proves faster since coax doesn’t require precise termination like Cat5e/Cat6 cable. But, DVR systems max out around 4K resolution with current HD-TVI technology, and adding cameras means running new cable, no wireless expansion options.
NVR (Network Video Recorder) systems use IP cameras connected via Ethernet or Wi-Fi. They support higher resolutions (up to 12MP+), Power over Ethernet (PoE) that delivers power and data through a single cable, and advanced analytics like facial recognition or smart motion zones. NVR setups offer more flexibility for expansion but demand solid network infrastructure and often cost 20-40% more for comparable channel counts.
Choose DVR when:
- The home already has coaxial cable installed
- Budget constraints limit equipment spending
- Reliable, no-fuss operation trumps cutting-edge features
- Night vision quality is a top priority
Choose NVR when:
- The home has robust networking or is prewired with Ethernet
- Advanced features like remote zoom or video analytics matter
- Future camera additions need wireless flexibility
- 4K+ resolution is non-negotiable
For comprehensive comparisons of current DVR security systems, expert reviews highlight how each technology handles real-world scenarios.
Essential Features to Look for When Choosing a DVR System
Channel count determines how many cameras the DVR supports. Common configurations include 4, 8, or 16 channels. Plan for at least two extra channels beyond current needs, adding a camera to cover a new door or blind spot shouldn’t require replacing the entire recorder.
Storage capacity affects how long footage remains accessible. A 2TB hard drive typically stores 7-14 days of continuous recording from four 1080p cameras, depending on compression and frame rate. Higher resolution or longer retention requires 4TB or larger drives. Most DVRs support drive swaps, but verify compatibility before upgrading.
Resolution compatibility matters for future-proofing. Look for DVRs supporting 5-in-1 technology (HD-TVI, HD-CVI, AHD, analog, and IP compatibility), which allows mixing camera types or upgrading individual cameras without replacing the recorder.
Remote viewing capabilities should include mobile apps for iOS and Android, plus web browser access. Test the app interface before committing, clunky controls or laggy live feeds defeat the purpose of remote monitoring.
Motion detection zones let users define specific areas to monitor, reducing false alerts from trees swaying or cars passing on the street. Adjustable sensitivity settings help fine-tune detection for each camera location.
Backup options need consideration. USB ports for quick exports, email alerts with snapshot attachments, and cloud backup support (optional) provide multiple ways to preserve critical footage. Look for systems supporting standard video formats (MP4 or AVI) that play on any device without proprietary software.
When evaluating security camera options, understanding how DVR features integrate with broader home protection matters.
Step-by-Step Guide to Installing Your DVR Security Camera System
Safety first: This project involves drilling, running cable through walls or attics, and working with 120V AC power. Wear safety glasses when drilling overhead, and use a non-contact voltage tester before working near existing wiring. If running cable requires opening walls in a finished space or drilling through fire-rated assemblies, check local building codes, some jurisdictions require permits for low-voltage installations that penetrate fire barriers.
Planning and Preparation
-
Map camera locations on paper, noting viewing angles and cable routes. Cameras should cover entry points, high-value areas, and any blind spots. Account for eave overhangs, soffit depths, and mounting surface material (vinyl siding, brick, stucco, or wood).
-
Measure cable runs from each camera location back to the DVR. Add 20% extra length for routing around obstacles and avoiding tight bends that damage coax. Most home security systems require pre-planning for cable paths.
-
Gather materials:
- DVR unit with power adapter
- Cameras (matching DVR channel count)
- RG59 or RG6 coaxial cable (pre-made or bulk with BNC connectors)
- 12V DC power supplies or distribution box
- Cable clips or staples (avoid crushing coax)
- Weatherproof junction boxes for outdoor connections
- HDMI or VGA cable for monitor connection
- Drill with masonry bits (if mounting to brick/concrete)
- Fish tape or cable rods for running wire through walls
Installation Steps
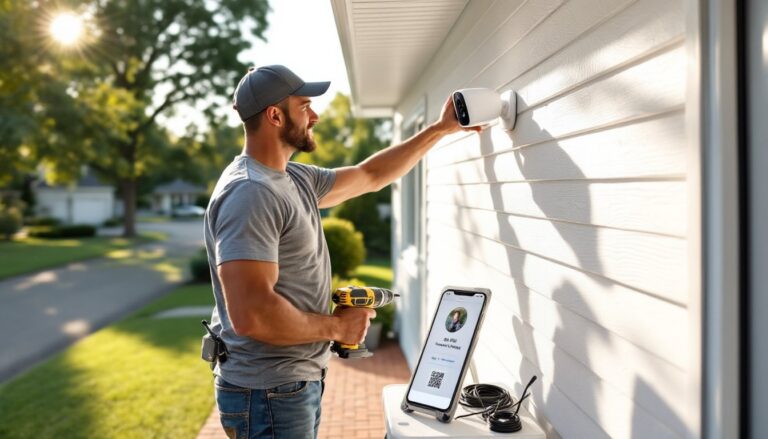
-
Mount cameras using the included brackets. Pre-drill pilot holes and use appropriate fasteners, lag screws for wood, masonry anchors for brick or concrete. Aim cameras slightly downward to capture faces, not just the tops of heads. Most cameras need a 7-15° downward tilt for optimal facial recognition at 10-15 feet.
-
Run coaxial cable from each camera back to the DVR location. Secure cable every 18-24 inches along its run using cable clips, avoiding sharp bends (maintain at least a 2-inch bend radius for RG59). When drilling through exterior walls, angle holes slightly downward toward the outside to prevent water intrusion, and seal penetrations with silicone caulk.
-
Connect power to each camera. If using individual adapters, plug them into GFCI-protected outlets (required by NEC for outdoor receptacles). For centralized power distribution, run 18/2 or 16/2 low-voltage wire from the distribution box to each camera location.
-
Connect cameras to the DVR by attaching BNC connectors to the recorder’s input ports. Match camera numbers to DVR channels for easier management. Tighten connections finger-tight, over-torquing can damage center pins.
-
Connect the DVR to a monitor via HDMI and to the home network via Ethernet. Power on the unit and follow the on-screen setup wizard to configure recording schedules, motion detection zones, and date/time stamps. Many systems supporting best home security features include guided setup modes.
-
Test each camera by triggering motion in its view and verifying recording starts. Adjust angles and detection sensitivity as needed. Set up mobile app access by scanning the DVR’s QR code or entering its network ID.
Pro Tips
- Label both ends of every cable run with camera numbers before installation, saves headaches during troubleshooting.
- Run an extra coax cable to one or two strategic locations for future camera additions.
- If fishing cable through walls, avoid electrical wiring by at least 6 inches to prevent interference.
- Consider a UPS (uninterruptible power supply) for the DVR to maintain recording during brief power outages.
Troubleshooting Common DVR System Issues
“No video” on specific channels: Check BNC connections at both camera and DVR, loose connectors account for 70% of signal loss issues. Inspect cable for damage, especially where it passes through wall penetrations or near metal edges that can sever the center conductor. Test the camera on a known-good channel to determine if the problem follows the camera or stays with the cable.
“Video signal lost” intermittently: Power supply issues top this list. Verify cameras receive steady 12V DC using a multimeter, voltage drop below 11.5V causes intermittent operation. Check wire gauge on long power runs: 18AWG maxes out around 50 feet for most cameras, while 16AWG extends that to 80+ feet. Consider upgrading to better security cameras with more efficient power management.
Grainy or distorted video: Coaxial cable runs exceeding 300 feet without amplification degrade signal quality. Install powered baluns or shorten cable routes. Also check for parallel runs alongside 120V electrical wiring, maintain 6-12 inch separation to minimize electromagnetic interference.
DVR won’t boot or freezes: Hard drive failure ranks high. Most DVRs emit warning beeps or display error codes when drives fail. Replace with a surveillance-rated drive (Western Digital Purple or Seagate SkyHawk) rather than standard desktop drives, surveillance drives handle constant write cycles better.
Can’t access DVR remotely: Verify port forwarding on the router matches the DVR’s HTTP and TCP ports (often 80 and 37777, but check manufacturer specs). Ensure the DVR has a static IP address or DHCP reservation to prevent the router from reassigning its address. Test mobile app access on cellular data to rule out local network issues.
Motion detection triggers constantly: Narrow detection zones to exclude trees, flags, or traffic. Reduce sensitivity settings, especially for cameras monitoring areas with changing light conditions. For persistent false alerts, position cameras to avoid direct sun angles that create contrast shifts as clouds pass.
When problems persist even though basic fixes, recent evaluations of DVR systems reliability reveal which brands handle long-term operation best.
Conclusion
A properly installed DVR security camera system delivers years of reliable surveillance without ongoing subscription costs or Wi-Fi dependency. The key lies in planning cable routes before drilling, choosing equipment that matches both current needs and future expansion, and taking time to dial in motion detection and recording settings. With comprehensive security solutions and current system comparisons, homeowners gain the knowledge to protect what matters most.