Installing a wireless home security system no longer requires a professional contractor or a fat check written to a monitoring company. Modern DIY wireless systems let homeowners take control of their property’s security without running cable through walls or signing multi-year contracts. These systems combine motion sensors, cameras, door/window contacts, and smartphone control into packages that most people can install in an afternoon. Whether protecting a single-family home, an apartment, or a rental property, wireless security offers flexibility, scalability, and the satisfaction of doing it yourself.
Table of Contents
ToggleKey Takeaways
- A DIY wireless home security system eliminates expensive professional installation ($500–$1,500) and multi-year contracts, costing $200–$800 for starter kits with optional self-monitoring via smartphone app.
- Core components—base station, door/window sensors, motion detectors, cameras, and keypads—communicate wirelessly without running cable through walls, making installation achievable in 2–4 hours for an average home.
- Strategic sensor placement at entry points, motion detector positioning in hallways, and camera angles covering faces and license plates maximize security effectiveness without additional hardware costs.
- Wireless systems work best with 2.4 GHz Wi-Fi, proper hub placement near your router, and regular signal strength testing, as interference from microwaves and neighboring networks can cause intermittent connection issues.
- Renters and homeowners benefit from flexibility—wireless components mount with adhesive strips or screws, pack up completely when relocating, and integrate with broader smart home automation for added convenience.
Why Choose a DIY Wireless Security System for Your Home
Wireless systems eliminate the biggest hurdle in traditional security installations: running low-voltage cable through finished walls. No fishing wires through insulation, no patching drywall, and no hiring an electrician. Components communicate via Wi-Fi, Z-Wave, or Zigbee protocols, connecting to a central hub or directly to your home network.
Cost savings add up fast. Professional installation for a wired system typically runs $500–$1,500 on top of equipment costs, depending on home size and complexity. DIY wireless systems from reputable manufacturers range from $200–$800 for starter kits, with no installation fees. Monthly monitoring is optional, many systems allow self-monitoring through a smartphone app at no recurring cost, though professional monitoring (usually $10–$30/month) adds 24/7 response.
Flexibility matters for renters and frequent movers. Wireless components mount with adhesive strips or a few screws, leaving minimal damage. When it’s time to relocate, the entire system packs up and reinstalls at the new address. Expanding coverage is straightforward, add sensors or cameras as needed without rewiring.
Modern home automation systems integrate door locks, lighting, thermostats, and voice assistants into unified control. A wireless security system often serves as the backbone for broader smart home functionality.
Essential Components of a Wireless Security System
Cameras, Sensors, and Control Panels Explained
A basic wireless security system includes several component types, each with a specific role:
Base station (hub): The brain of the system. It communicates with all sensors and cameras, processes alerts, sounds the alarm siren (typically 85–110 decibels), and connects to your home Wi-Fi. Most hubs include battery backup lasting 12–24 hours during power outages. Position the hub centrally in your home for best wireless range, typically 100–300 feet in open air, less through walls.
Door and window sensors: Two-piece magnetic contacts that trigger when separated. The sensor mounts on the door or window frame, the magnet on the moving part. When armed, opening the door breaks the magnetic field and sends an alert. Quality sensors use 433 MHz or Z-Wave frequencies with 3–5 year battery life from a CR123A or coin cell.
Motion detectors: Passive infrared (PIR) sensors detect body heat moving through their field of view. Mount these at 6–7.5 feet high in corners for diagonal coverage across rooms. Most have a detection range of 30–40 feet with a 90–110° field of view. Pet-immune models ignore animals under 40–80 pounds, though settings vary.
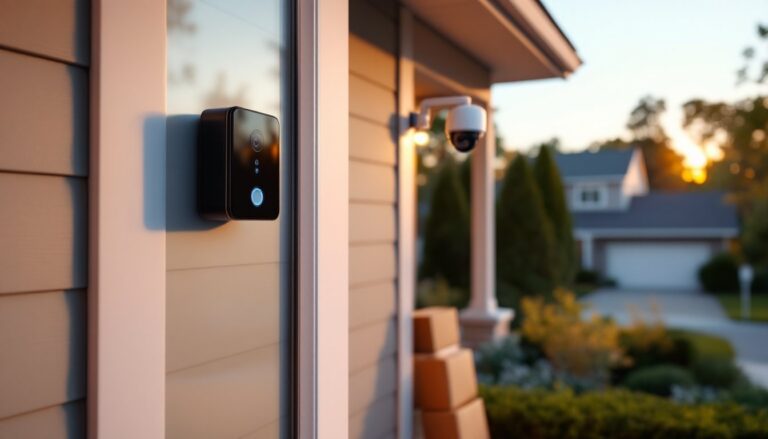
Security cameras: Indoor and outdoor wireless cameras add visual verification. Look for 1080p minimum resolution, night vision (850 nm infrared LEDs), and IP65 weatherproof rating for outdoor use. Battery-powered cameras offer true wireless installation but require recharging every 2–6 months depending on activity. Wired cameras plugged into outdoor outlets provide continuous power. Many homeowners combine outdoor security cameras with doorbell cameras for comprehensive coverage.
Keypad: A wall-mounted control panel for arming/disarming without a smartphone. Essential for family members, guests, or backup access. Keypads mount near primary entry doors with adhesive or two screws into drywall.
Glass break sensors: Acoustic detectors that recognize the frequency of breaking glass within 15–25 feet. One sensor can cover multiple windows in a room. These supplement door/window contacts in areas with large glass expanses.
Step-by-Step Installation Process for Wireless Security
Setting Up Your Base Station and Configuring the App
Start by mapping out your security zones on paper before opening any boxes. Walk your property’s perimeter and identify all entry points: exterior doors, first-floor windows, garage access doors, and basement windows. Mark locations for motion detectors covering main living areas and hallways leading to bedrooms.
-
Position the base station: Place it within 6 feet of your Wi-Fi router initially for stable setup, then relocate if needed. The hub needs a power outlet and should sit on a shelf or desk, not inside a closet where signal weakens. Keep it away from large metal objects and aquariums that block radio signals.
-
Download the manufacturer’s app (iOS or Android) and create an account. The app guides you through connecting the hub to your Wi-Fi network. You’ll typically scan a QR code on the hub or enter a serial number. Use your 2.4 GHz Wi-Fi band if your router is dual-band, most security devices don’t support 5 GHz.
-
Add sensors one at a time through the app. Each sensor enters pairing mode when you remove a battery pull tab or hold a button. The app confirms connection with a chime or notification. Label each sensor clearly: “Front Door,” “Kitchen Window,” “Master Bedroom Motion.” This identification becomes critical when alerts fire at 2 AM.
-
Mount door and window sensors with provided adhesive strips (peel-and-stick 3M VHB tape on quality systems) or drill pilot holes for screws if mounting on metal or brick. Align the sensor and magnet with the arrows indicated, keeping the gap under 1/2 inch when closed. Test each sensor by opening the door/window and verifying the app shows “open.”
-
Install motion detectors in room corners at the recommended height, angled down toward the floor. Avoid pointing them at windows (direct sunlight causes false alarms), HVAC vents (moving air can trigger PIR sensors), or directly at stairs. Test walk patterns through the room and check the app confirms motion detection.
-
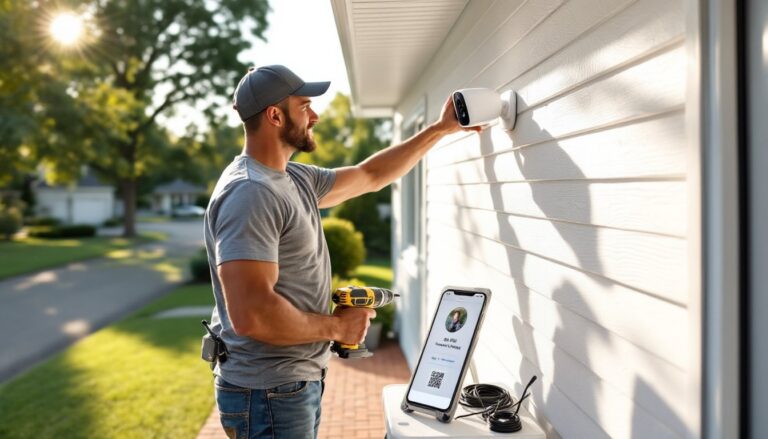
Mount cameras using the provided brackets. Outdoor cameras should angle down at 15–30° to capture faces at entry points, positioned 8–10 feet high to prevent tampering. Run a test recording to verify the field of view covers the intended area. For battery cameras, ensure they’re accessible for recharging, avoid mounting 15 feet up a wall.
-
Set up monitoring modes: Configure “Home,” “Away,” and “Night” modes with different sensor combinations. Away mode arms everything: Home mode might disable interior motion sensors: Night mode arms perimeter doors/windows while you sleep. Adjust entry/exit delays (30–60 seconds standard) to give you time entering your code.
-
Test the complete system by arming it and triggering sensors. Verify alerts reach your phone within 5–15 seconds (cellular latency varies). Test the base station siren, it should be audible throughout the house. Walk through disarming procedures with household members.
Safety note: Never disable smoke detector integration if your system offers it. Many modern comprehensive security systems include smoke/CO monitoring as a standard feature.
Full system installation typically takes 2–4 hours for an average three-bedroom home with 10–15 sensors. Having a cordless drill, level, and ladder on hand speeds the process, though most sensors install with adhesive alone.
Optimal Placement Strategies for Maximum Coverage
Strategic sensor placement multiplies system effectiveness without buying extra hardware. Follow these field-tested guidelines:
Entry point coverage: Secure every ground-floor door and window. Second-floor windows often get skipped, but if there’s roof access, tree branches within 6 feet, or a porch below, add sensors there too. Sliding glass doors need sensors on the moving panel plus a secondary contact on the fixed panel, burglars sometimes lift sliders off tracks.
Motion detector positioning: Place one detector covering the main hallway to bedrooms, an intruder can’t reach sleeping areas without crossing this choke point. Add detectors in living rooms, kitchens, and bonus rooms if budget allows. Avoid bathrooms (privacy) and laundry rooms (vibrating machines cause false alarms). The detector should see the most likely path through a room, typically diagonal from a corner.
Camera sight lines: Front door cameras should capture the porch, face height of visitors, and a bit of the street for vehicle IDs. Driveway cameras need angles showing license plates, this requires positioning cameras 15–20 feet from where cars park. Backyard cameras cover patio doors and fence gates. Avoid aiming cameras at neighbors’ properties or public sidewalks beyond your lot line, privacy laws vary by state.
Range limitations: Most wireless sensors have a 100–250 foot range to the hub through typical residential construction (drywall, wood framing). That range drops to 50–100 feet through brick, stone, concrete, or metal. Large homes may need a wireless range extender or secondary hub. Test signal strength through the app after mounting distant sensors, many systems show connection quality.
Glass break sensor placement: Mount these on walls opposite large windows or in room centers. One sensor covers multiple windows if they’re within range. Don’t place them near stereo speakers or inside cabinets.
Environmental considerations: Outdoor cameras and sensors require appropriate IP ratings, IP65 minimum for weather resistance. Avoid mounting battery-powered cameras in direct summer sun: heat accelerates battery drain and can shorten device life. Similarly, door security hardware needs weather-appropriate ratings when protecting exterior entry points.
Wireless interference increases near microwave ovens, baby monitors, cordless phones, and neighbors’ Wi-Fi routers on the same channels. If sensors drop offline intermittently, try relocating the hub or changing your router’s Wi-Fi channel.
Troubleshooting Common Installation Challenges
Hub won’t connect to Wi-Fi: Verify you’re using the 2.4 GHz network, not 5 GHz. Check that your router doesn’t have client isolation or AP isolation enabled (common on guest networks), this prevents devices from communicating. Temporarily disable router firewalls or VPNs during initial setup. Move the hub closer to the router and retry.
Sensors show “low battery” immediately: Remove and reinsert batteries, ensuring correct polarity. Some sensors ship with battery saver tabs that should be fully removed. If a sensor drains batteries within weeks, it’s likely losing connection to the hub and constantly retrying, improve signal strength or relocate the hub.
Motion detector false alarms: Check for heat sources in the field of view: heating vents, space heaters, or windows with direct sun. Adjust sensitivity settings in the app (usually low/medium/high options). For pet false alarms, verify the detector is mounted at the proper height and angled correctly, pointing straight across a room detects pets: angling slightly down ignores floor-level movement.
Camera video lag or buffering: Wireless cameras consume significant bandwidth, especially at higher resolutions. A single 1080p camera uses 2–4 Mbps upload bandwidth when streaming. Multiple cameras can saturate home internet if upload speed is under 10 Mbps. Lower recording quality to 720p or adjust motion-detection recording to reduce continuous streaming. Position cameras closer to the Wi-Fi router or add a mesh network node nearby. According to tests from home technology reviewers, proper network infrastructure makes the difference between smooth streaming and constant buffering.
Adhesive mounts failing: Clean mounting surfaces with isopropyl alcohol before applying adhesive, dust and oils prevent bonding. Press firmly for 30 seconds and let adhesive cure 24 hours before testing. In high-humidity areas (bathrooms, basements), use screws instead. For rental properties where drilling is prohibited, 3M Command strips rated for the sensor’s weight work well.
App notifications not arriving: Check phone notification settings, security apps need permission to send alerts and run in background. On iOS, verify Background App Refresh is enabled. On Android, exempt the security app from battery optimization. Some users need to allow notifications from “unknown sources” depending on app setup.
System doesn’t arm/disarm from phone remotely: This requires the hub to communicate with the manufacturer’s cloud servers. Verify the hub shows “online” status. Check your router doesn’t block outbound connections on uncommon ports. Some corporate or university internet connections restrict IoT device communication, this won’t work on those networks.
Sensors triggering in wrong modes: Re-check your mode configurations in the app. A sensor accidentally assigned to “Home” mode will trigger when you’re inside, which isn’t usually desired. Most systems allow per-sensor, per-mode customization.
If problems persist after troubleshooting, contact manufacturer support before dismantling everything. Many issues resolve with firmware updates, check for hub and sensor updates in the app settings. Keep your purchase receipt and warranty information: reputable companies offer 1–3 year warranties on wireless security components.
Installing wireless security technology provides peace of mind and property protection without the complexity of professional systems. Take your time during installation, test thoroughly, and adjust configurations as you learn your system’s patterns. Most homeowners find they expand their initial setup within six months, adding cameras, extra sensors, or integrated smart locks as comfort with the technology grows.